A Simulation Group is a set of Simulations that runs together in a batch. Users have the ability to create and modify these groups, eliminating the need for manual selection of multiple Models each time they wish to run them. By simply selecting a predefined group and clicking "Run," users can execute the Simulations effortlessly.
The chosen Models are saved within the Simulation Group, enabling users to easily rerun the group in the future without the need to manually select the Models again.
Each Simulation Group is equipped with its own settings, which define the Run Configuration Settings (such as Run Type, Virtual Machine, etc.). When triggered, the Simulation Group executes each Model on separate Virtual Machines simultaneously, utilizing the specified Simulation Group settings.
Follow the steps below to create a Simulation Group via the Models Tab:
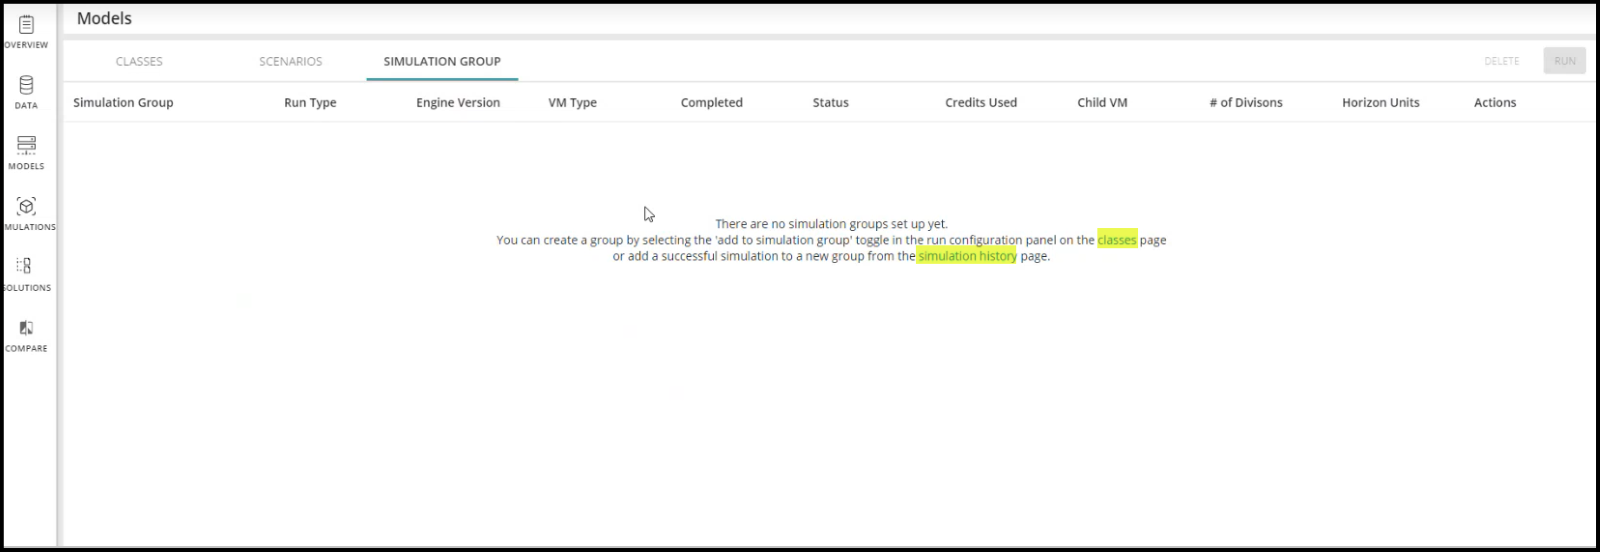
1. Go to Models and then Simulation Group, you will get the following screen if there is no group.
2. Click on the Class or Simulation History page to create a Simulation Group.
3. From Class, select the Model and click on Run.
4. It will open the Run Configuration Panel. Click on the toggle Add to Simulation Group as shown in the following image.
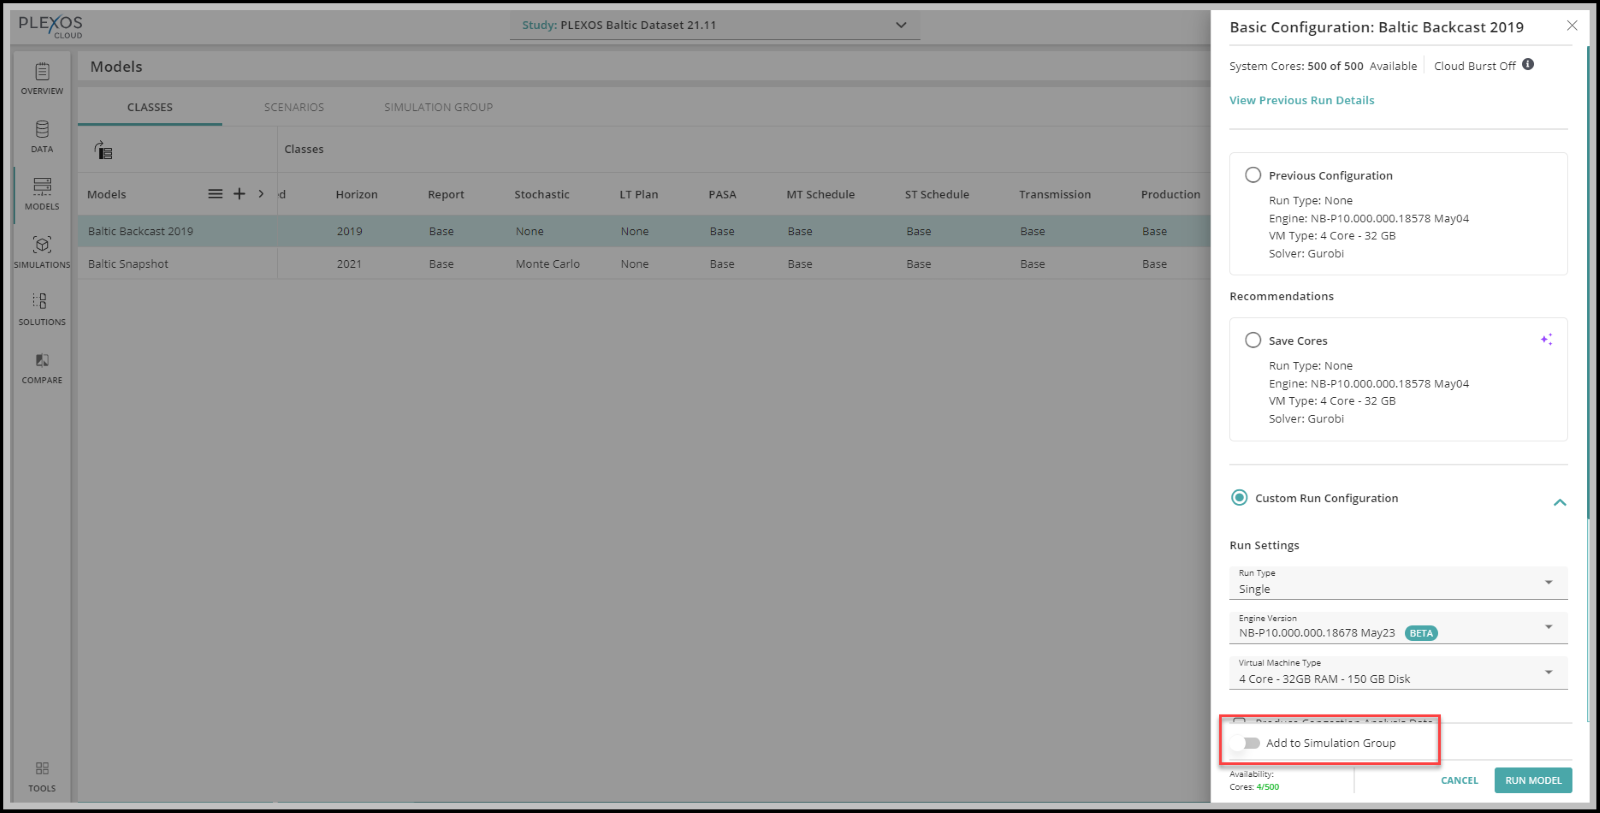
5. It will ask you to create a new Group or Add to an existing group if you have any.
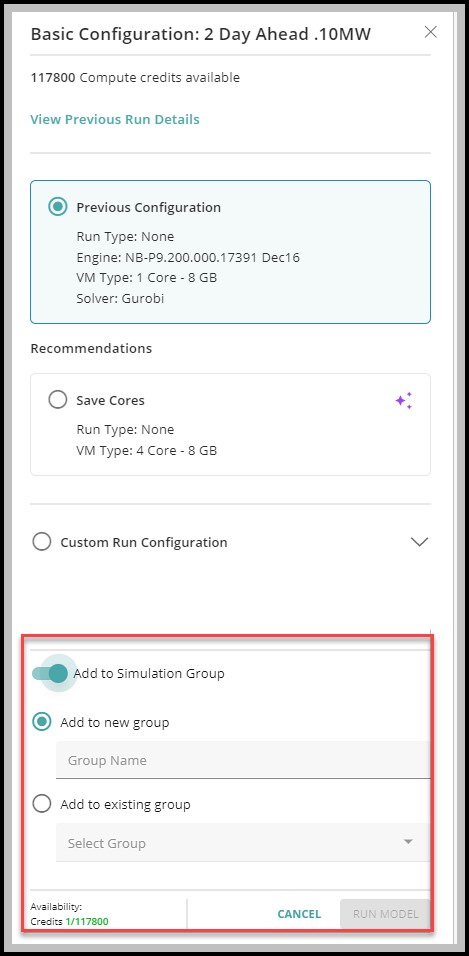
6. Click on Run.
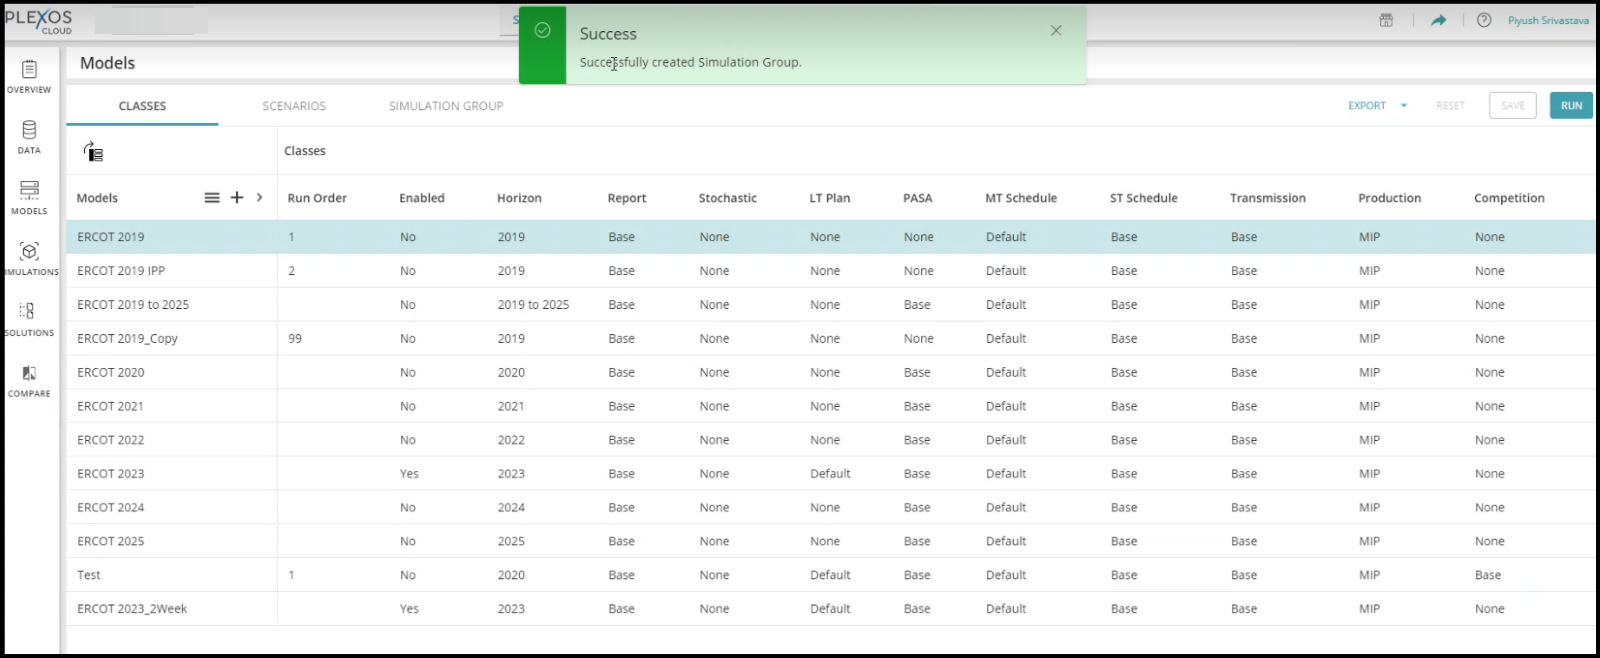
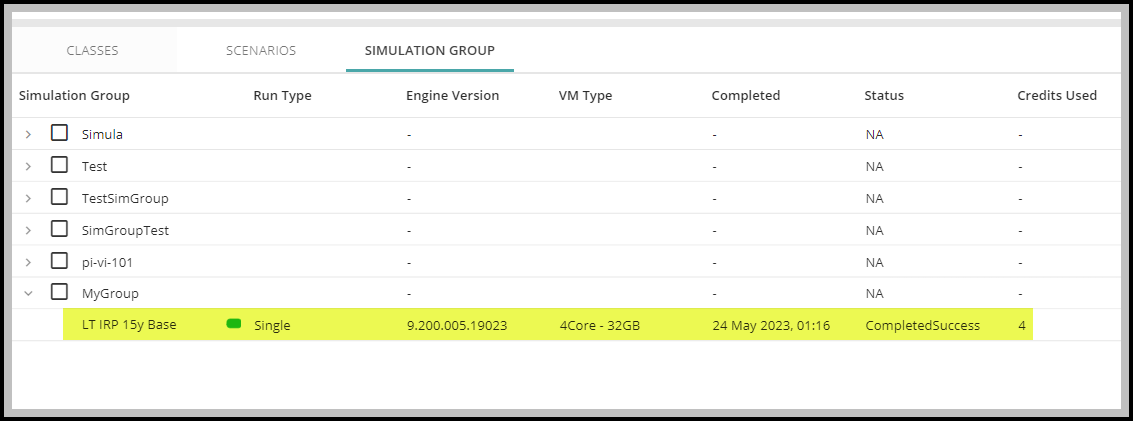
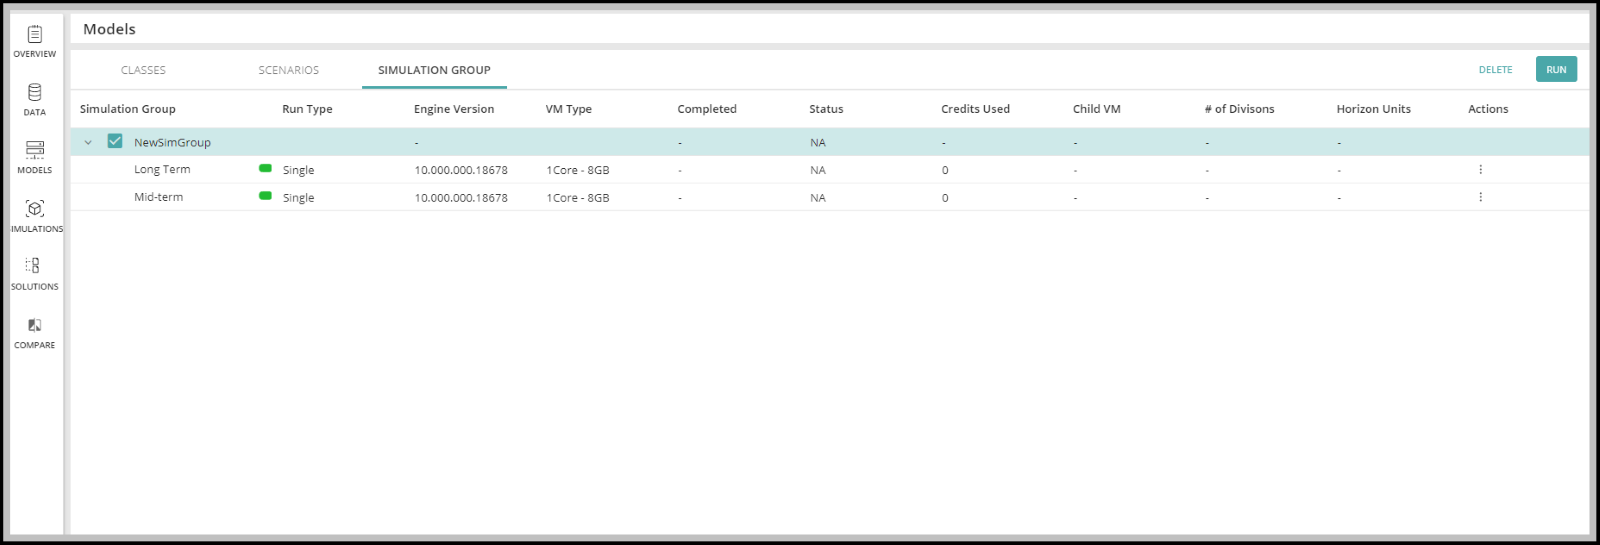
7. You can see the created group under the Simulation Group tab.
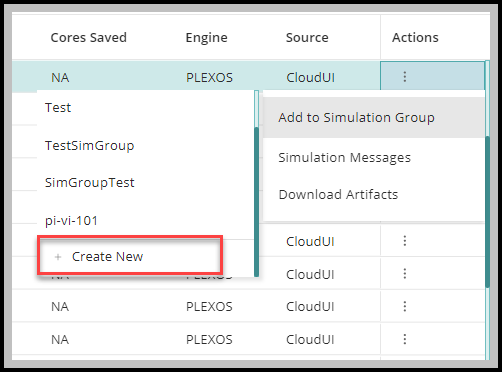
Select any Simulation which you want to add to the Simulation Group and click on the Action menu as shown below.
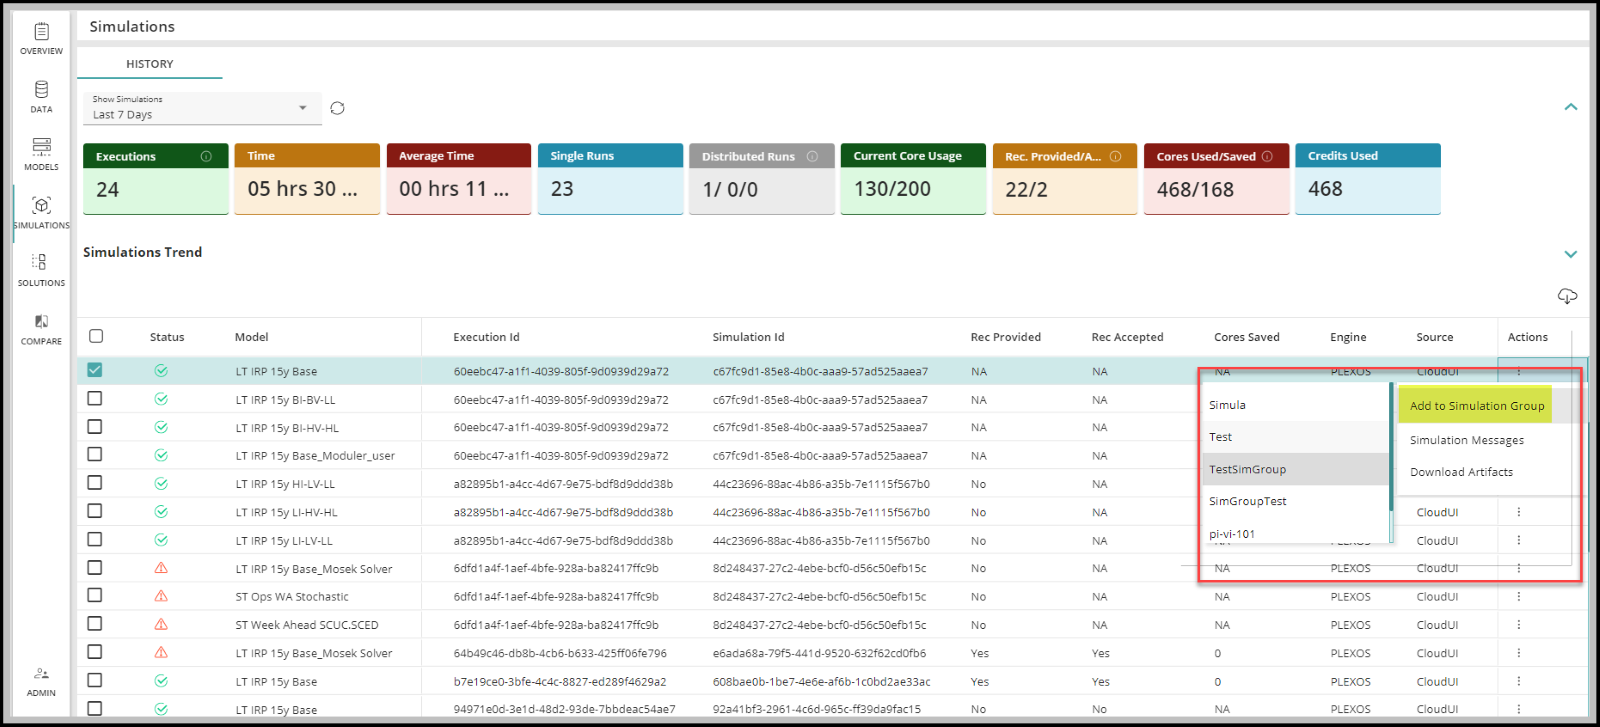
You can either add to the existing group or create a new group. To create, select Create New.
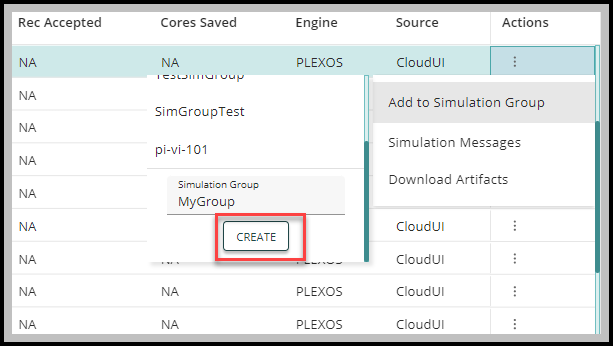
Enter a unique name for your Group and click CREATE
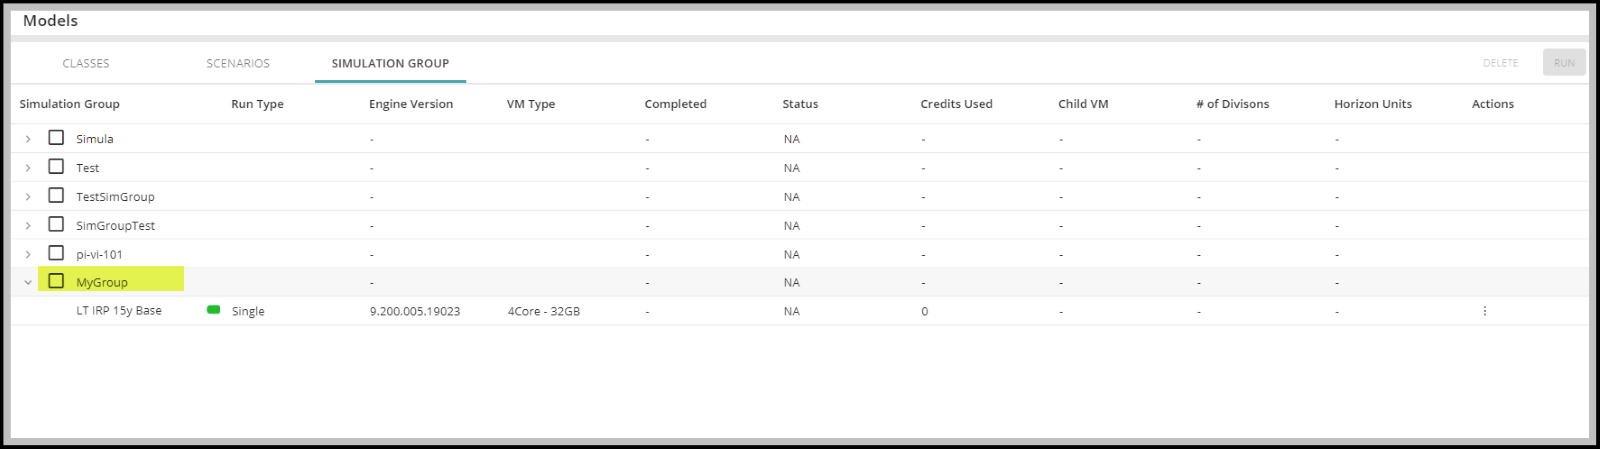
You can view your newly created group under Models > Simulation Group
Select the group which you want to Run and click on Run. Please note that you can only be able to select one group at a time.
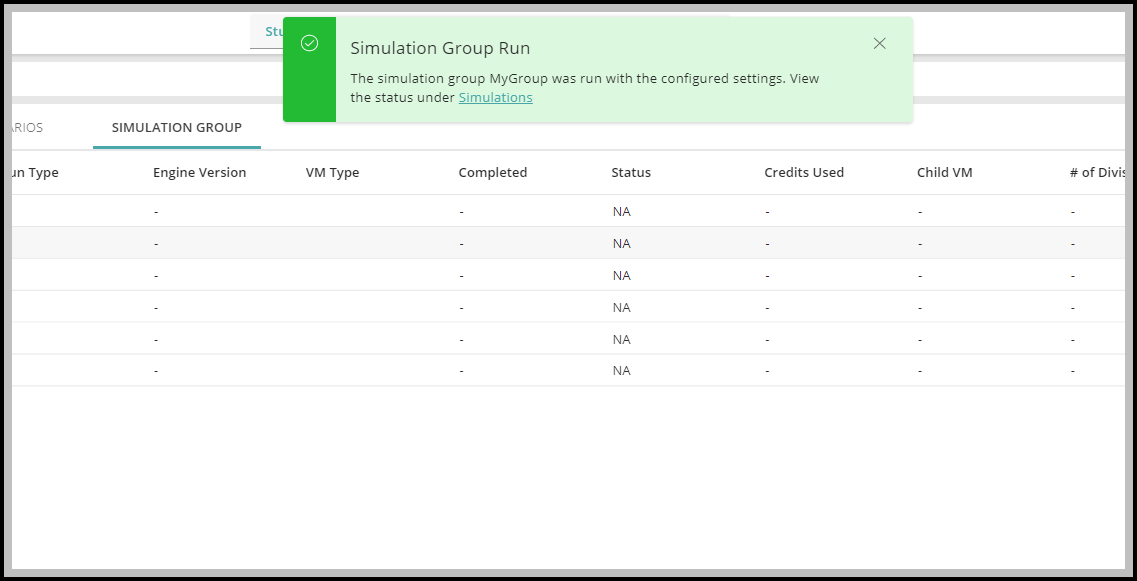
From the Message box, click on Simulations to view the status of your run.