Project Scheduler 
Use this form to schedule recurring project runs or to run multiple projects. The use of the project scheduler form is unique to the open instance of Aurora and the scheduler file loaded. This means that different projects/schedules can be run simultaneously in different instances of Aurora.
Features and use of the form are described below.
Toolbar
-
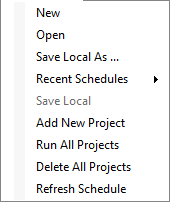
The Schedule dropdown gives options to manage Aurora Scheduler Files (.xsf).
-
New opens a new scheduler file. You will be prompted to save current edits.
-
Open loads an existing scheduler file.
-
Save Local or Save Local As... saves the information in the scheduler form as a .xsf file.
-
Recent Schedules provides a dropdown of recently used .xsf files.
-
Add New Project adds a new row to the form which can then be populated to schedule projects.
-
Run All Projects runs all enabled projects on the scheduler form. The runs are executed immediately when the button is clicked. This option includes a Time Delay Specification that tells the model how long to wait before starting the next project in the list. This is helpful when launching multiple projects simultaneously that all use the same input database to avoid all projects trying to access the data at once.
-
Delete All Projects deletes all projects (rows) from the scheduler form.
-
Refresh Schedule reloads the original/last saved schedule file settings.
-
-
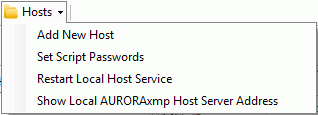
-
Add New Host - Use this to configure additional host services.
-
Set Script Passwords - Use this to enter a user name and password for IIR resource outage data scraping.
-
Restart Local Host Service - Use this to restart the service in the even of a problem when connecting with the local host.
-
Restart Local Host Service - This will open a box with the address of the local host.
-
The Project Scheduler toolbar provides access to the following actions.
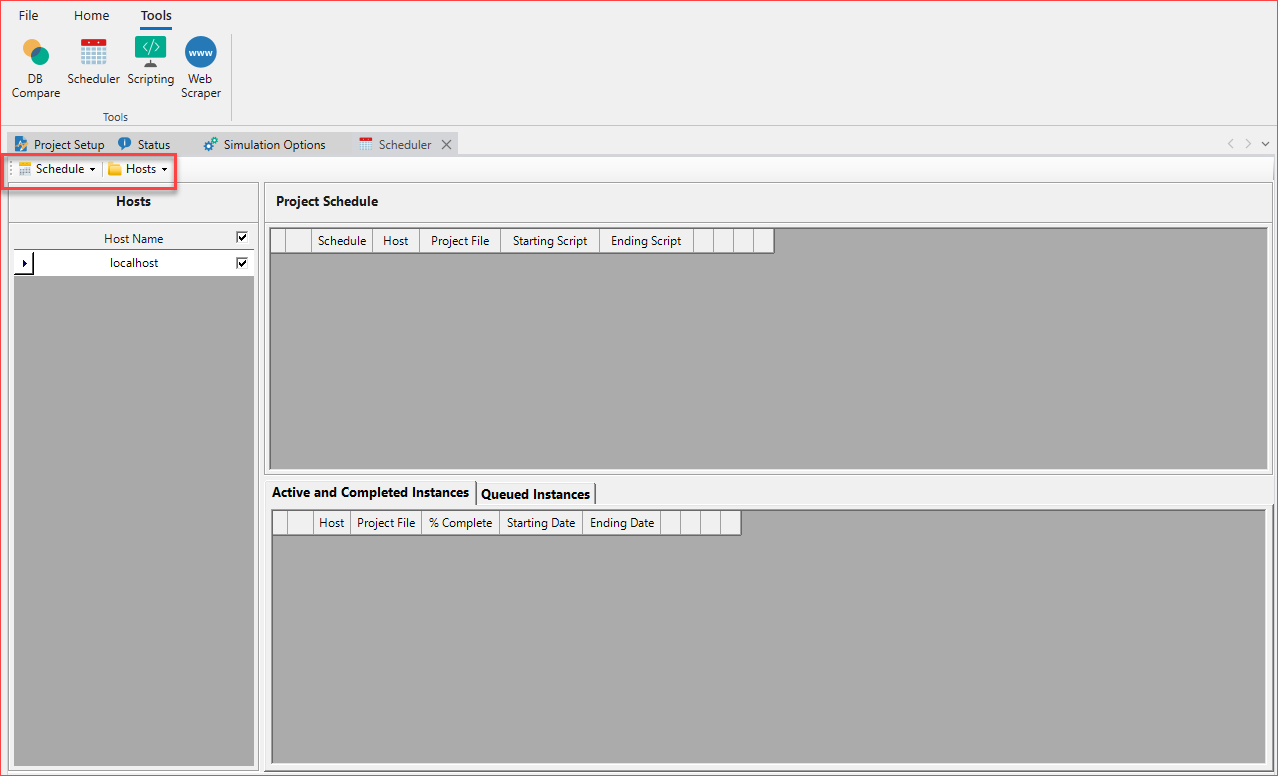
Project Schedule
The Project Schedule section is used to select projects and scripts and to edit the schedule.

Column Descriptions
|
Hover your cursor over this icon to move the record up or down in the list. When multiple projects are run using the Run All Project button they will execute in the order (top to bottom) on the list.
The status symbol will appear as:
Even if the project is enabled, it will remain unscheduled if any information is missing or if the schedule date occurs in the past. |
Turns the schedule for the project on or off.
Select the host service on which to run the project.
Identifies the project file (.apz) to be run by the scheduler. The files will appear in the following colors: blue - valid project is enabled and scheduled to run. gray - valid project, but not enabled. Project will not be run. red - invalid project file path/name.
|
Starting ScriptStarting Script
|
Immediately runs the project on that record. If another study is currently running, the project will not run until that one finishes.
Deletes the project record form the schedule form. |
Active and Completed Instances
The Active and Completed Instances section shows the currently running instances on the Aurora Host and their status.

|
The icon in the first column indicates the state of the running instance.
This field identifies the host used for that record by the scheduler. |
This field identifies the project file (.apz) currently loaded in the instance by the scheduler.
This field show the current progress of the run if it is in the middle of a simulation. It also indicates whether or not the instance is initializing, idle, running a script, or if an error has occurred. |
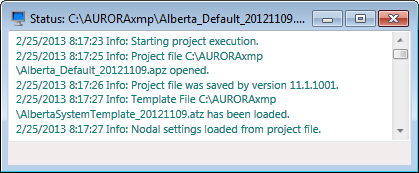
Use this button to view the status window from the run.
This button will pause a running instance on the Host or resume an instance that has been paused. |
This button will tell the Host to stop running a project and issue a close command to shut down the instance.
This button will force the Host to immediately close the open instance. Any unsaved data will be lost. |
Queued Instances
The Queued Instances section shows the projects that have been loaded into the queue.

|
Hover the cursor over this symbol to move the record up or down in the list. When multiple projects are run using the Run All Project button they will be added to the queue in order (top to bottom) from the schedule list.
This field identifies the order in which the scheduled projects have entered the queue. (They will enter the queue in the order defined above in the schedule section.) |
|
This field show the date and time the project was loaded into the queue.
This button will remove the project from the queue. |
Host
The Hosts section allow users to configure multiple host services and schedule and monitor projects across them. Users with a large number of projects and/or machines can make better use of their existing infrastructure by utilizing automation across various hosts.
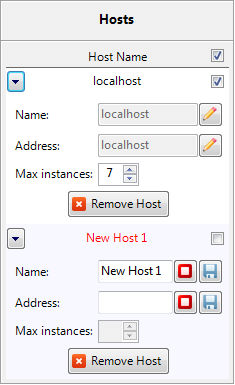 |
For example, a machine that has 8 cores, but only 4GB of RAM should have maximum instances set no higher than 2. On the other hand, a machine with 8 cores, but 32GB of RAM could have a maximum of 7 instances.
|
Troubleshooting
The following information highlights situations that may require additional consideration.
Files on Networks
In environments where projects are located on network shares, several additional settings must take place for the Host service to operate correctly. First, enable the Use UNC paths when selecting files via the File menu > Options form. Secondly, the Host must be set to run under an account that a) has access to the network share where the files are located and b) has the proper permissions to access the files/folders for the Host and can create new ports via the Net.TCP Port Sharing service.
The quickest solution would be to create a domain account in the Windows Active Directory domain that has both Administrative privileges on the local machine as well as read/write access to the specific network shares. After the account is created, the Host service must be set to run as this new account (via Log On As under the Service Properties window).
See the Project Scheduler FAQ for additional information.
 Productivity Tools
 Scheduler


 Start/Run Project
 Delete Project
 Status
 - No project is loaded
 - Instance is running
 - Instance
  - Simulation has been paused by the user
 - Simulation has been stopped by the user
 - Simulation has completed
 - Simulation has completed; there were warnings during the run
 - Project error
 Stop and Close Instance
 - Edit the host or address.
 - Cancel the edit will return to previous host.
 - Save the edit will save the host name or address.