PLEXOS Cloud on Aurora Tutorial
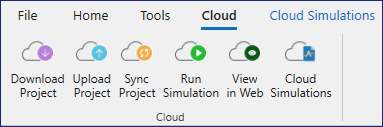
The first time you run an Aurora project on PLEXOS Cloud, you will use the Cloud tab on the toolbar (shown below) to upload your project. A full project upload is only required the first time a project is placed on the Cloud. To run subsequent changes, use the Sync Project button to only upload project settings and changed data.

Important: To make the initial upload go more smoothly, ensure that your Aurora project, input database, and other associated files are in a separate folder from other Aurora projects. To aid in database detection, place output databases in a subfolder within a folder where the input database and project are located.
To run a simulation using PLEXOS Cloud on Aurora:
- Access the Cloud toolbar (shown above).
NOTE: If the buttons on the Cloud toolbar are grayed out, ensure you are signed into PLEXOS Cloud using the button on the top right of the Aurora main window.

- Upload your project to the Cloud by clicking the Upload Project button.
- A dialog will appear to prompt for a Study name. This name is the unique identifier the Cloud will use for your project going forward. By default, it is the name of your Aurora project.

- Your project and its associated files will be compressed, encrypted, and securely uploaded to the Cloud environment. The Cloud buttons that were previously grayed out will become available.
- Click Run Simulation from the Cloud Tools Tab to start a simulation in the Cloud. A dialog appears that provides several options:
a. Sync with Cloud before starting simulation — By default, syncing occurs automatically to ensure you are running the latest changes to your project.
b. Run Study Cases in parallel cloud machines — If you are running multiple Study Cases, a cloud machine will be allocated to each individual Study Case, reducing overall runtime.

c. Choose the number of CPU Cores and memory needed to run the simulation. (The available machine specs are determined by the Cloud environment you are signed into.)
d. Select the Aurora Version to run the simulation.
- Click the Run button. A Cloud Sync dialog appears for you to describe the latest changes to your project. This will upload the latest changes in the project to the Cloud.

- Click OK. The Cloud Simulations window will appear with information about the current Cloud study and any queued simulations. As the simulation runs, messages and simulation progress are displayed.

- When the simulation is complete, you can use the Download Output Database to download the results from the Cloud and view them on your machine. Aurora output on the Cloud is in .xdb format by default. After download, output can be converted to SQL Server or other formats.
See Cloud Simulations for more detailed information on running a simulation and troubleshooting.
![]() PLEXOS Cloud on Aurora Tutorial
PLEXOS Cloud on Aurora Tutorial