PLEXOS User Interface Guide Chapter 3
Contents
1. Getting Started
Open PLEXOS by selecting the "PLEXOS 8.x" icon from your computer's desktop or by going to Energy Exemplar >> "PLEXOS 8.x" in the Windows Start Menu.
Note: The licence file is inspected at start-up. If the license is missing, invalid, or it has expired the interface will not start. For help with licensing, contact the PLEXOS support desk at support@energyexemplar.com
2. Ribbon-Style Menu
The desktop user interface of PLEXOS implements a modern ribbon style of menus. The ribbon consolidates all functionality to create and edit databases, run models and review simulation results and invoke the (optional) PLEXOS Connect® client-server functions.
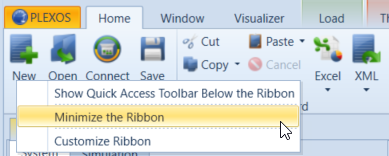
The ribbon can be minimized from view by right-clicking the Ribbon and selecting "Minimize Ribbon". To restore the Ribbon, right-click the "Home" tab and deselect "Minimize Ribbon".
The menu icons are organized in the main tabs "File", "Home" and "Window". The "Home" tab includes commands such as "New", "Open" and "Copy".
Depending on whether you open an input database file or a solution file, the "Home" tab extends to accommodate command icons relevant to the operations for the respective file type.
 Home Tab for an Input Database
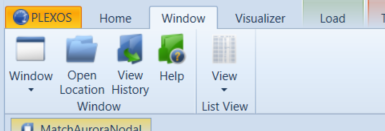
The Window tab contains additional commands depending on the type of file open:
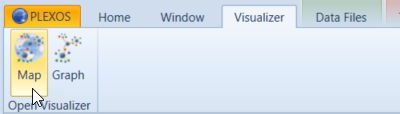
The Visualizer tab contains the Map and Graph Visualization functions of the PLEXOS GUI. To open the Map or Graph Visualization Windows, select Map or Graph from the Visualizer tab of the Ribbon.
2.1. Main Ribbon Commands
The commands available on the Home tab and their functionality are described below:
NewCreates a new file representing a power system: there is always one database file (XML file) representing the system, its elements as objects and their relationships and data.
OpenLaunches the file open dialog box where you can select an existing file to open. Note that a list of recently opened files is available by clicking the PLEXOS Button.
ConnectOpens the PLEXOS Connect Launch Control which allows you to upload and download files to or from the client-server system.
SaveSaves changes made to the currently open file. Note that edits are not saved automatically, but you will be prompted to save changes if you attempt to close the current file when there are unsaved changes. Choosing "No" in this case discards any changes you have made since the last save.
Note: Whenever you save an input file, a backup copy is made under the same name but with extension BAK. You can restore this backup by removing the extension. You may need to configure Windows to show filename extensions in order to make this change.
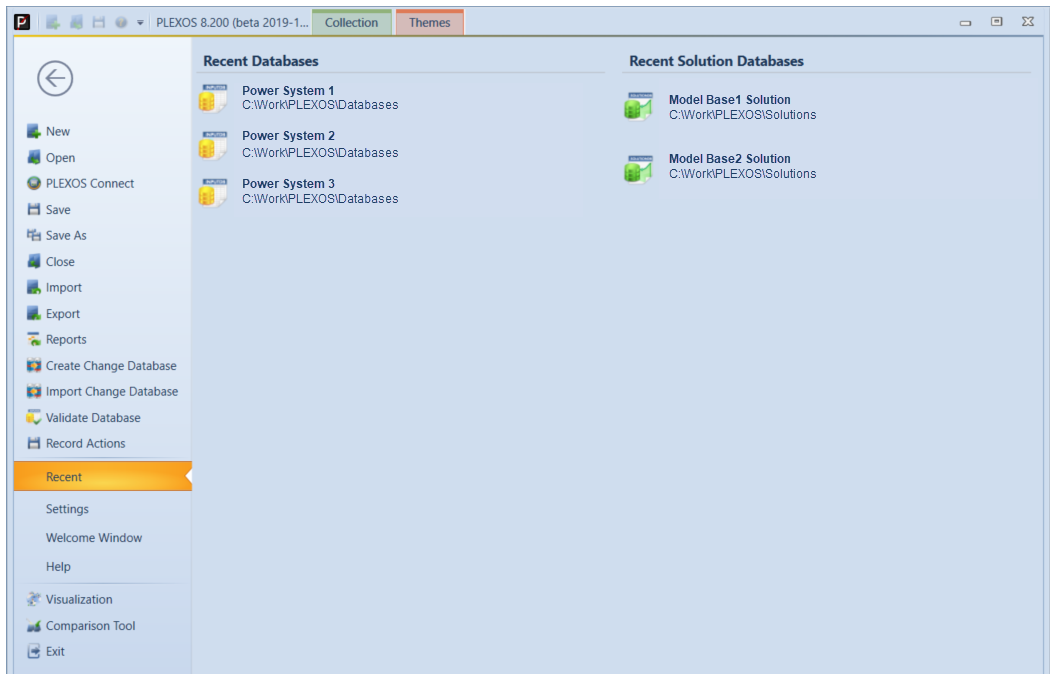
Backstage Menu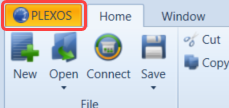
Clicking on the File tab opens up the Backstage Menu allowing access to further commands such as Program Settings and Help. The names of the most recently opened files are also displayed on the menu. These are shown in two groups, the first being input files, the second output files. To open a listed database, simply click on the file.
Some of the additional items in the Backstage Menu are described below:
Import/ExportLaunches the Import Wizard for importing data from other programs, or to export data from a PLEXOS database to XML or Excel format.
ReportsOpens the PLEXOS Solution Reporting feature where you can generate reports from solution files. This is designed to provide Solution query results with more advanced projection and filtering than the Solution Viewer. It generates results in HTML or XML format.
Create Change DatabaseThe change system provides a way for users to create a database which is a subset of a larger database. Such subset databases can be loaded on top of other related databases.
Import Change Databaseopens a tool for importing one or more change databases into a "base" database.
Validate DatabaseRuns various validation tests on the data integrity of a database. Some validation errors can be repaired using this tool.
Record ActionsAllows screen capture video recording of user interaction with the PLEXOS GUI. In order to utilise this feature, Microsoft Expression Encoder 4 has to be installed.
On clicking "Record Actions" a separate dialog appears, where recording the process can be set and controlled.

In the screen capturing dialog, you can also start and stop the recording. The save file dialog appears after clicking record.
RecentDisplays recent Model Databases and Solution Databases.
SettingsOpens a dialog box where you can change global settings for the PLEXOS software related to the View (e.g. Tree display, Font) and Execution (e.g. File Delimiter, Data Validation, Parallel Execution).
Welcome WindowOpens the PLEXOS welcome window which displays recently used model databases and solutions.
VisualizationAllows you to export a transmission graph.
Comparison ToolLaunches the comparison tool which allows you to compare two versions of an input database and examine/merge changes.
Help Sub Menu CommandsThe items on the Help menu are:
 Exit
Exit
Closes the current file and prompts to save any unsaved changes
2.2. Additional Commands With Files

Cut, Copy, Paste
Provides Clipboard operations for the data grids: see the section Clipboard Operations
ExcelTransfers data from the current data grid selection to an Excel Spreadsheet: see the section Clipboard Operations
Export, ImportProvides Export/Import functions to XML on the clipboard, so that objects can be copied from one input database to another, including their associated Memberships: see the section Clipboard Operations
Find ReplaceOpens the Find/Replace interface for the active data grid.
ChangesLaunches the Database Compare Window for the current database (see Tracking Changes). This shows the changes you have made in the current session, compared to the version of the database currently on disk. This also allows you to reject changes performed by reverting parts of the database to the saved version.
Fill column, Up, Down, Selection, PropertyThe commands fill grid columns with data. These commands can be used to add new data in bulk, or to copy a value down a column. See Models and Scenarios.
ExecuteOpens the Execute Window where you can select Models and Projects to execute and start a simulation or batch of simulations.
BuildOpens the Build Window where you can use text file building functions to create series of text input data, such as load forecasts or wind generation profiles.
ConfigOpens the configuration Window where you can select the input properties that are available for each class of object in the database.
SettingsOpens the Settings Window for the database where you can change settings such as the units of data.
The following additional commands are available from the Backstage view when an input file is open:
Saves the current file to a new filename.
Export to MDExports the current XML format database to a Microsoft Access format database.
Note: This option is only available on computers that have Microsoft Access installed.
TransmissionAllows for the export of transmission data to one of the supported graphical formats.
2.3. Additional Commands for Solution Files
The following commands are available when a Solution database is open.

These commands are discussed in detail in the Solution files section.