Using MySQL with Aurora
This document outlines the installation and configuration of MySQL for Aurora to use as an output database.
Installation
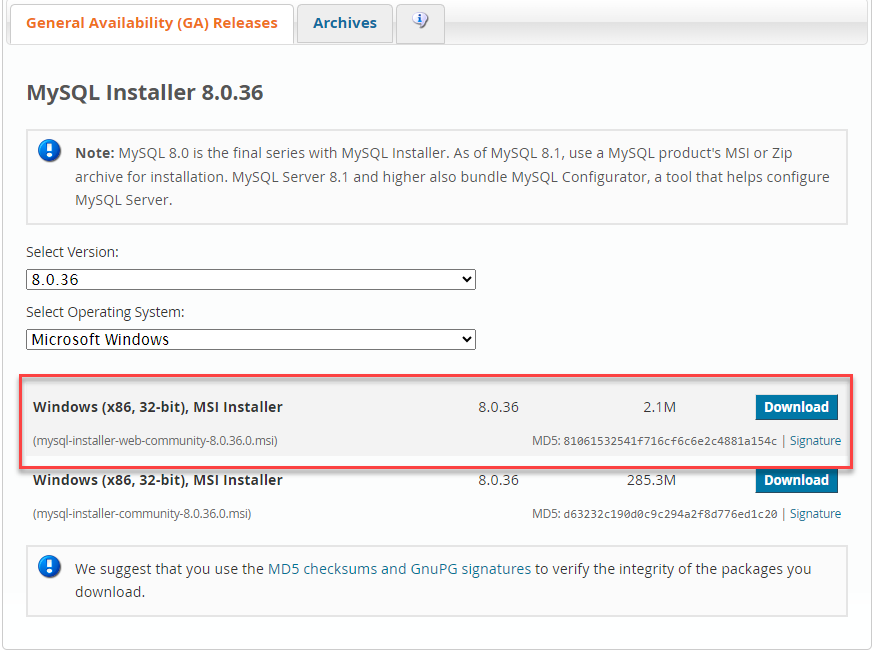
Download the latest version of MySQL from https://dev.mysql.com/downloads/installer/. New versions of MySQL are released frequently so the version numbers change often. Look for the current recommended release, which is usually found at the top of the downloads page.
- Click the "Download" button.
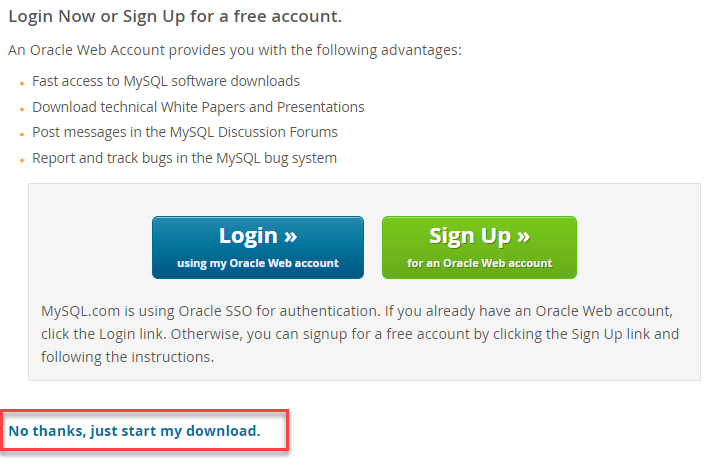
- You do not have to sign up for an account to download the installer, so just click "No thanks, just start my download" at the bottom of the page.
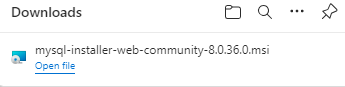
- Once you have downloaded the unzipped setup file, start the install process by double-clicking on the installer in your Downloads folder.
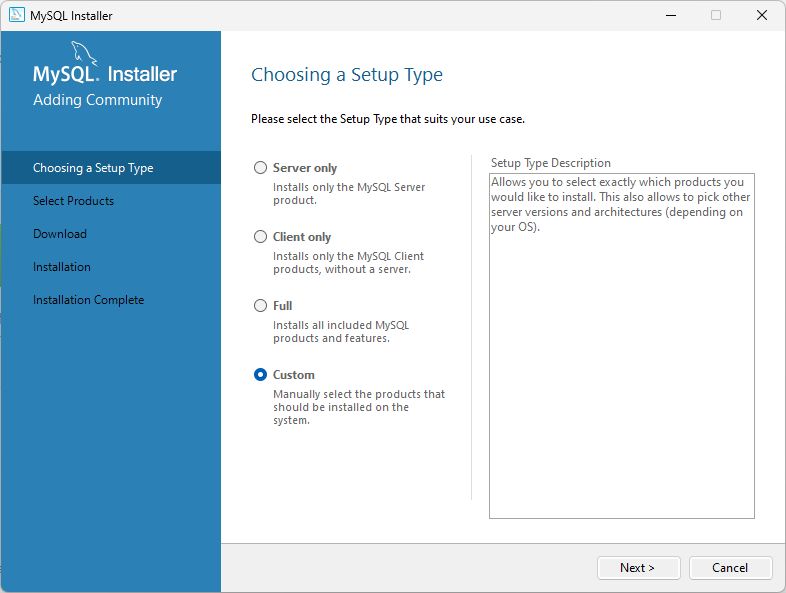
- When running the installer setup, choose "Custom" as the Setup Type.
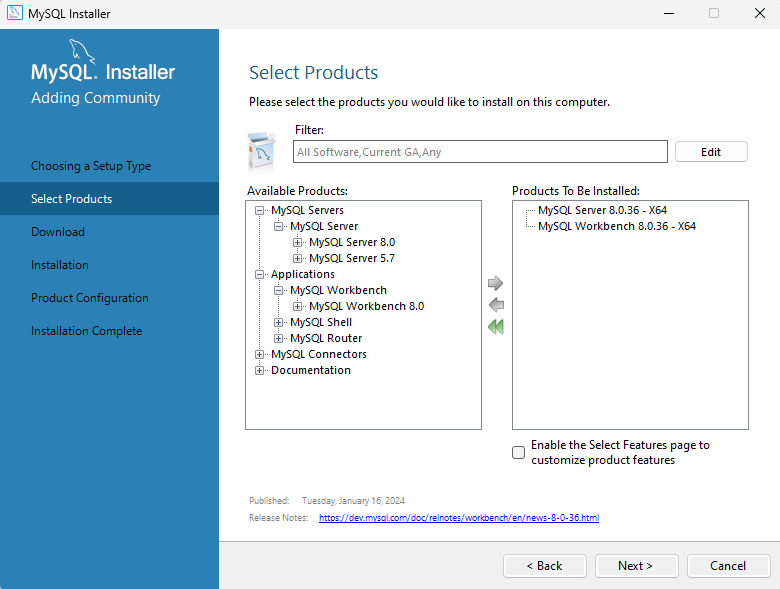
- Choose to install the latest version of MySQL Server and MySQL Workbench by moving them to the "Products To Be Installed" window.
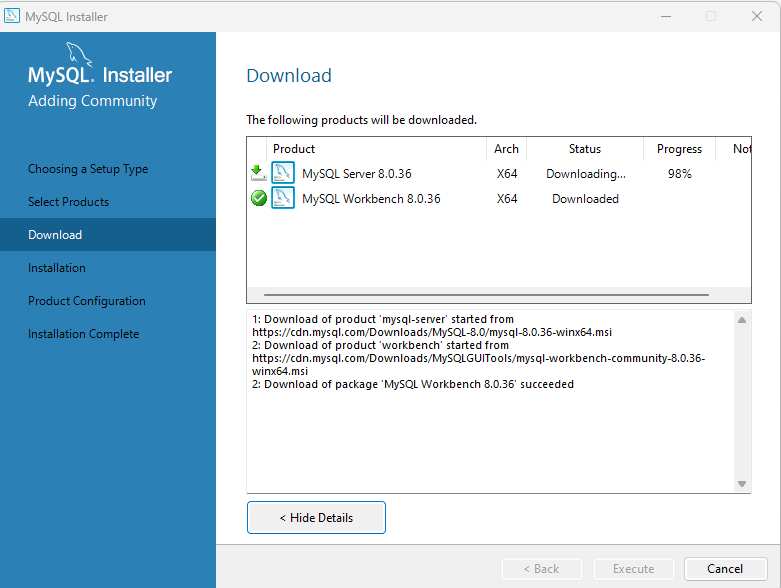
- Click "Execute" to download the installer packages. A downloading status will display in the window.
- Click “Next" and "Execute" buttons to start the installation.

- When the installation is finished, click "Next" to start the Product Configuration. You will mostly be using the default settings.
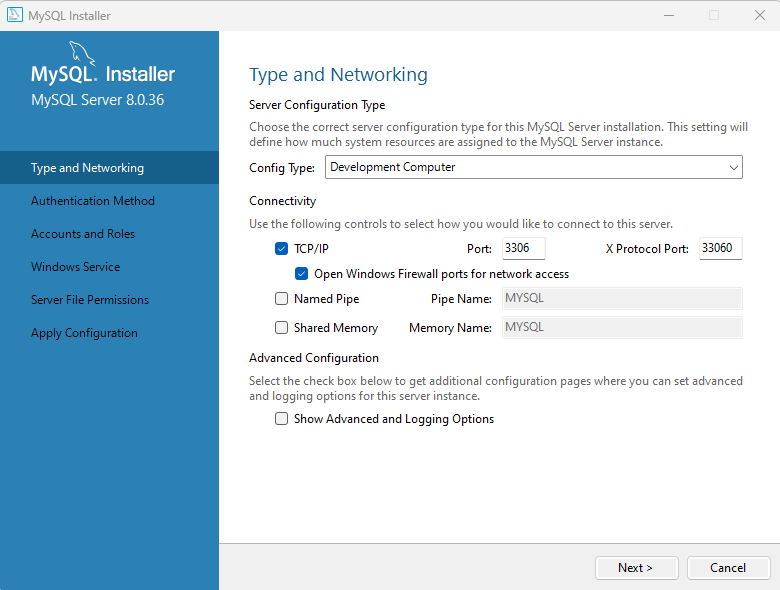
- Click "Next."
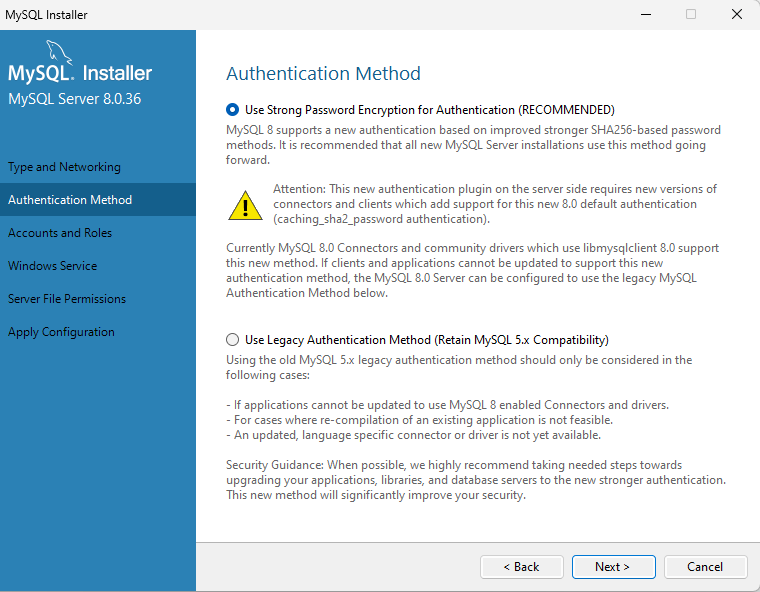
- Select "Use Strong Password Encryption for Authentication and click "Next." Create a password to use when using MySQL Server and then click "Next."
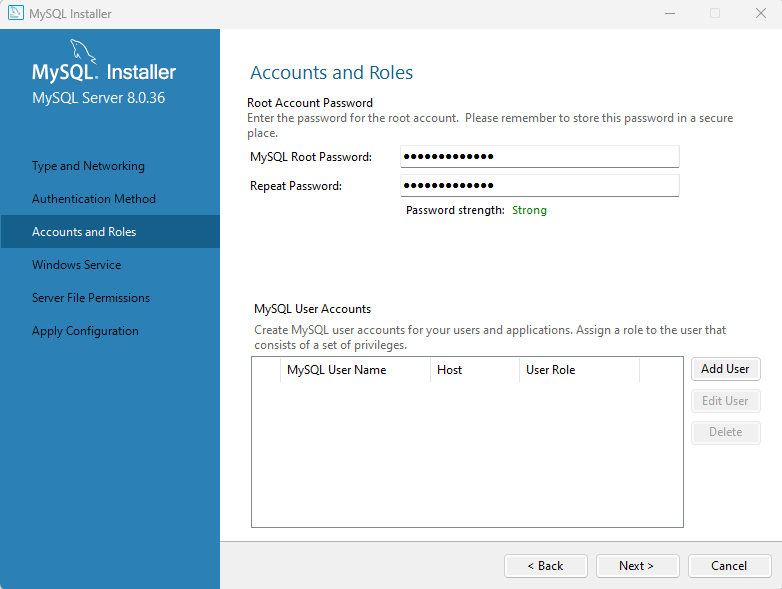
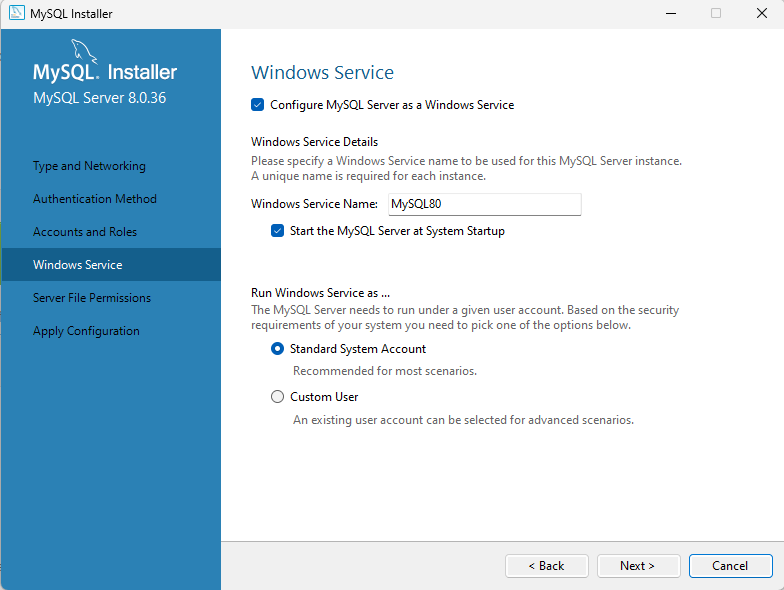
- We recommend that you make the selections below to install MySQL as a Window Service.
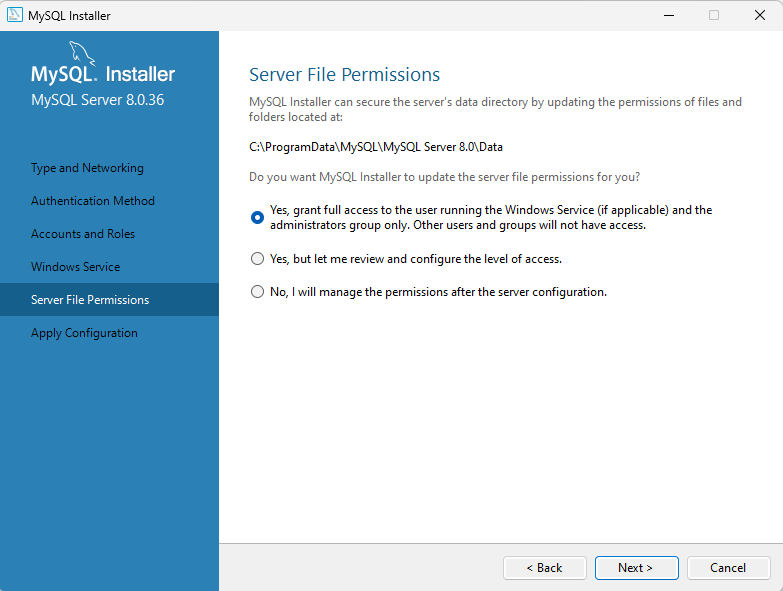
- You will not have to set up any users since you will be using the default "root" account. You can leave C:\ProgramData\MySQLServer 8.0\Data and "Yes, grant full access to the user running the Window Service (if applicable) and the administrators group only. Other users and groups will not have access." as shown. Click "Next."
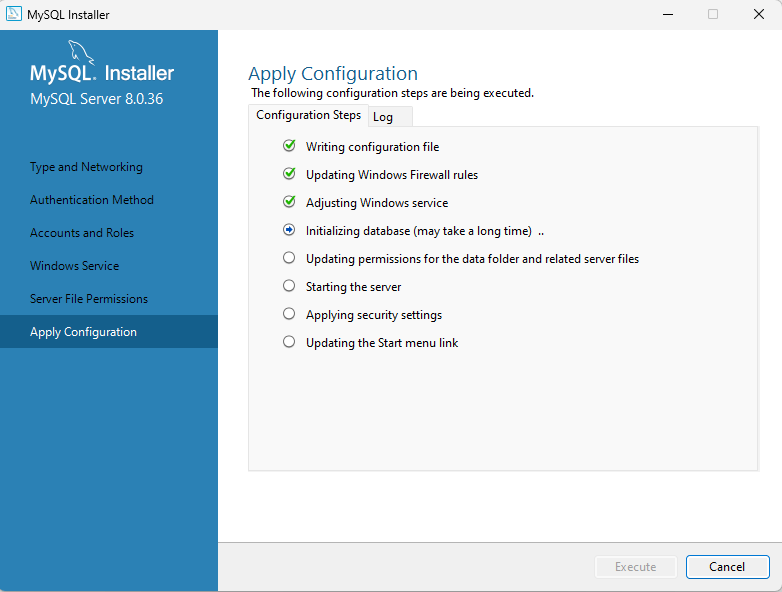
- Click "Execute" to finish installing, and then applying the configuration.
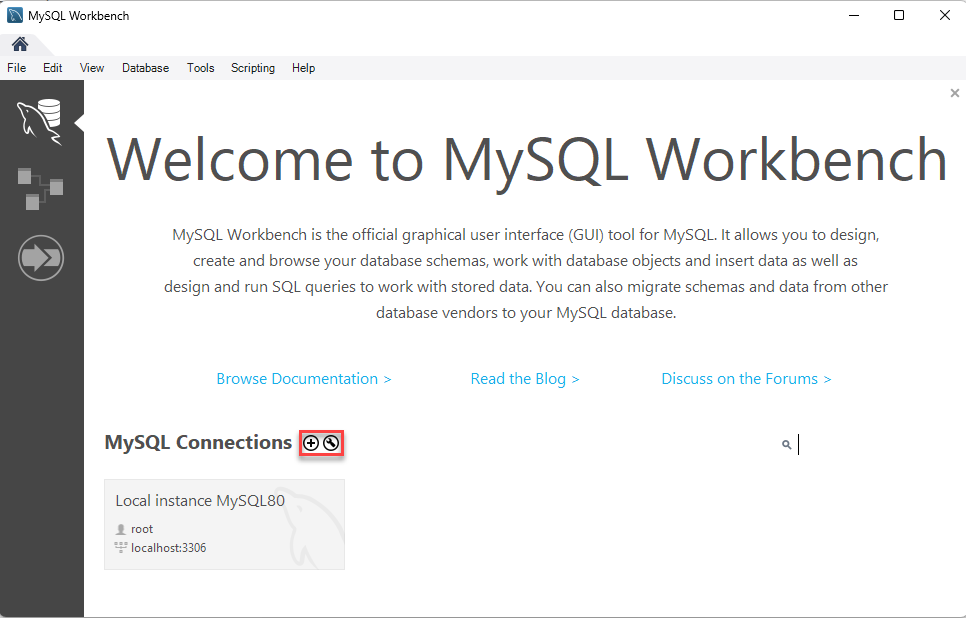
- Once the wizard finishes installing everything, the MySQL Workbench application opens. On the homepage, click the "+" button to create a new connection between MySQL Workbench (which allows you to view the data) and the MySQL Server, which stores the information in a database.
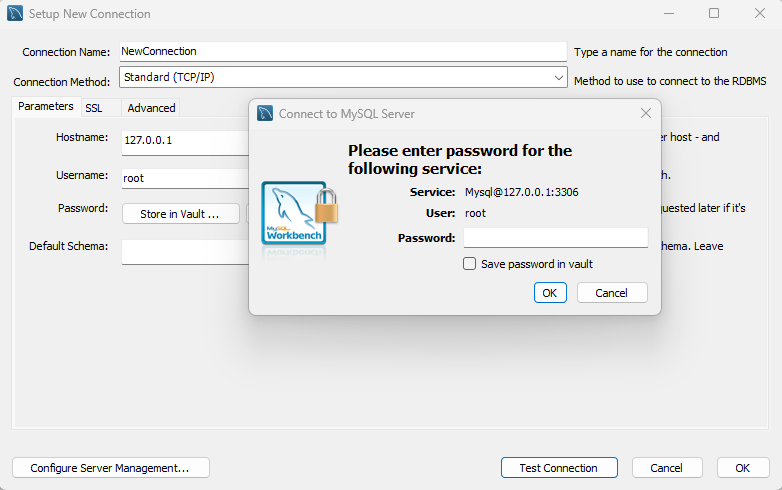
- Type in a new Connection Name, click on "Test Connection" and then enter your Password. It will be the same password that is set up for the root account in Step 10 above.
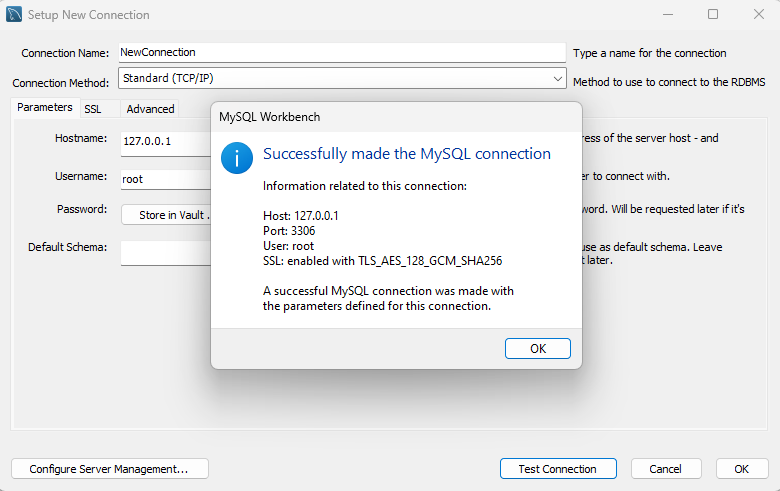
- Use the default values for everything else. You can click the “Test Connection” button to make sure everything is valid and the MySQL connection is successful. Click “OK” to finish creating the connection.
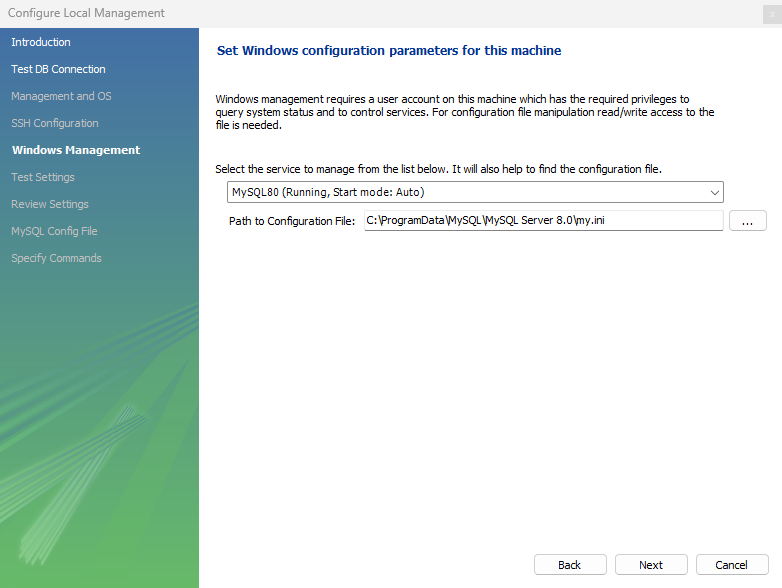
- Click on "Configure Server Management..."
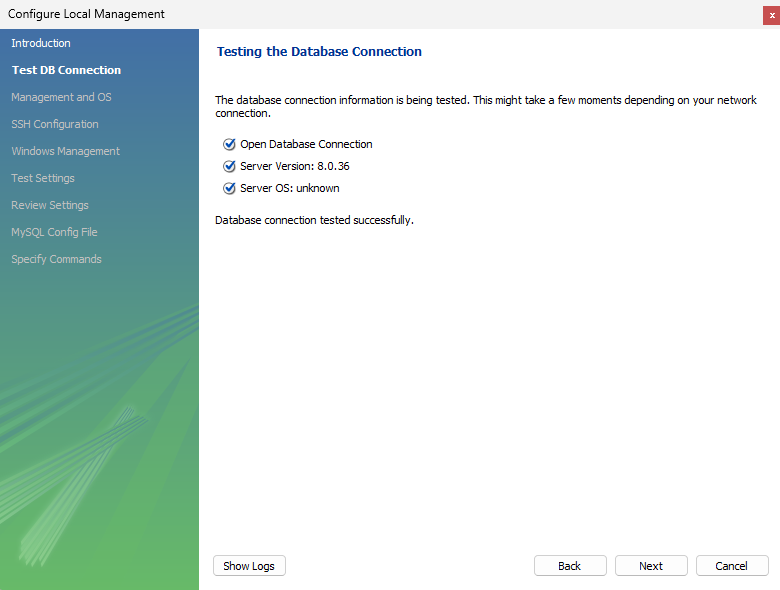
- Click "Next" and then select the service to manage as MySQL and finish stepping through the Configure Local Management Wizard.
- Go to the Aurora application to set up your MySQL database. Go to Project Setup and select MySQL as the output Database Type.
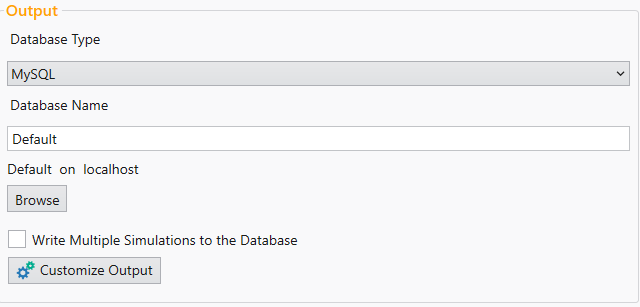
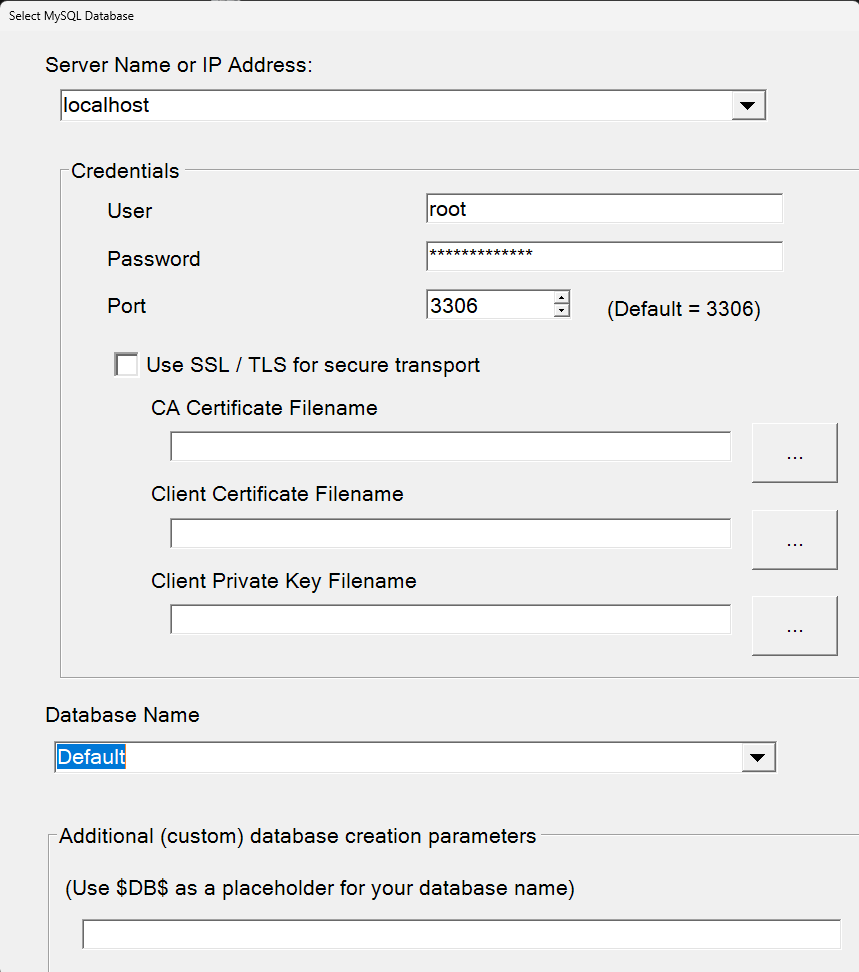
- Click the "Browse" button. Select the Server Name as "localhost" and username as "root." Enter your MySQL password that you created. Once that is set, you should be able to start a simulation and write to that MySQL output database.
You can see the output database either using the Aurora Output database window or by using the MySQL Workbench.
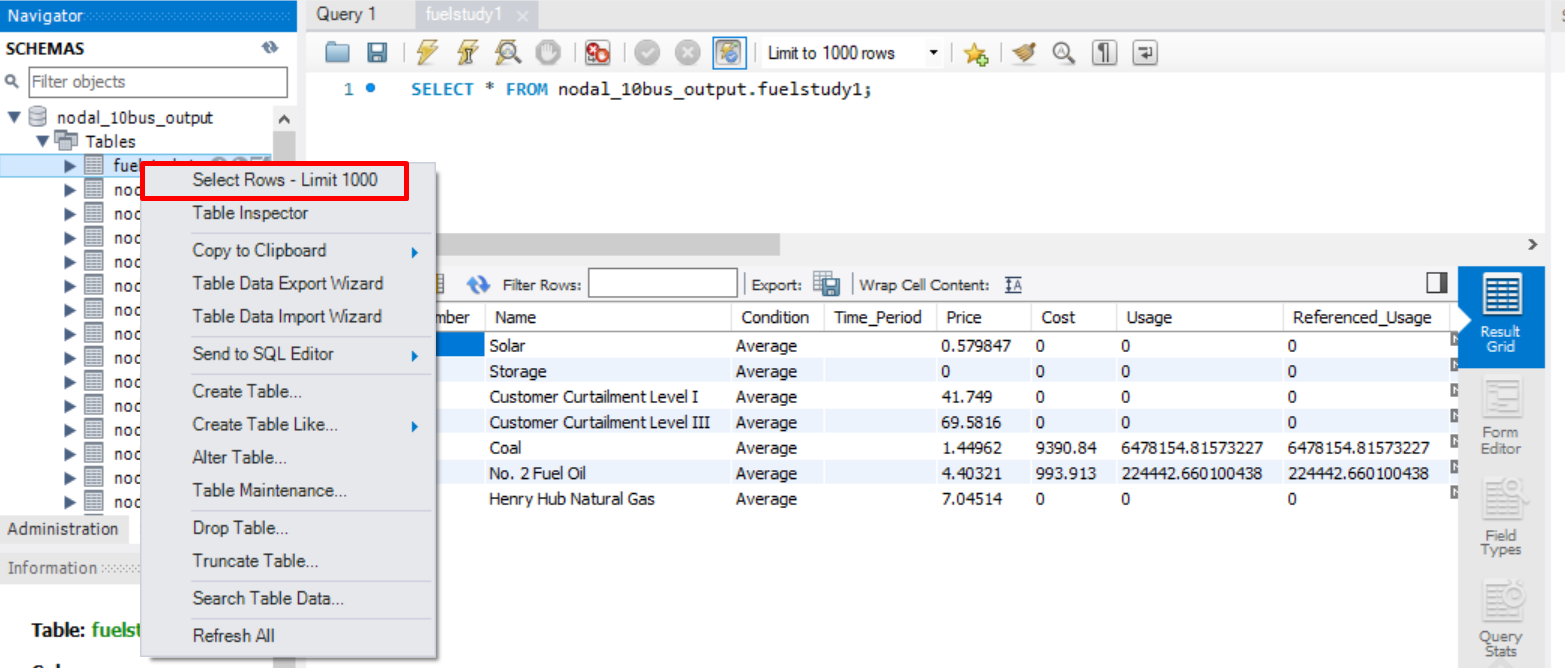
- On the MySQL Workbench "Home" page, double-click your new connection . When the connection opens, click "Schemas" and you should see the new output database.
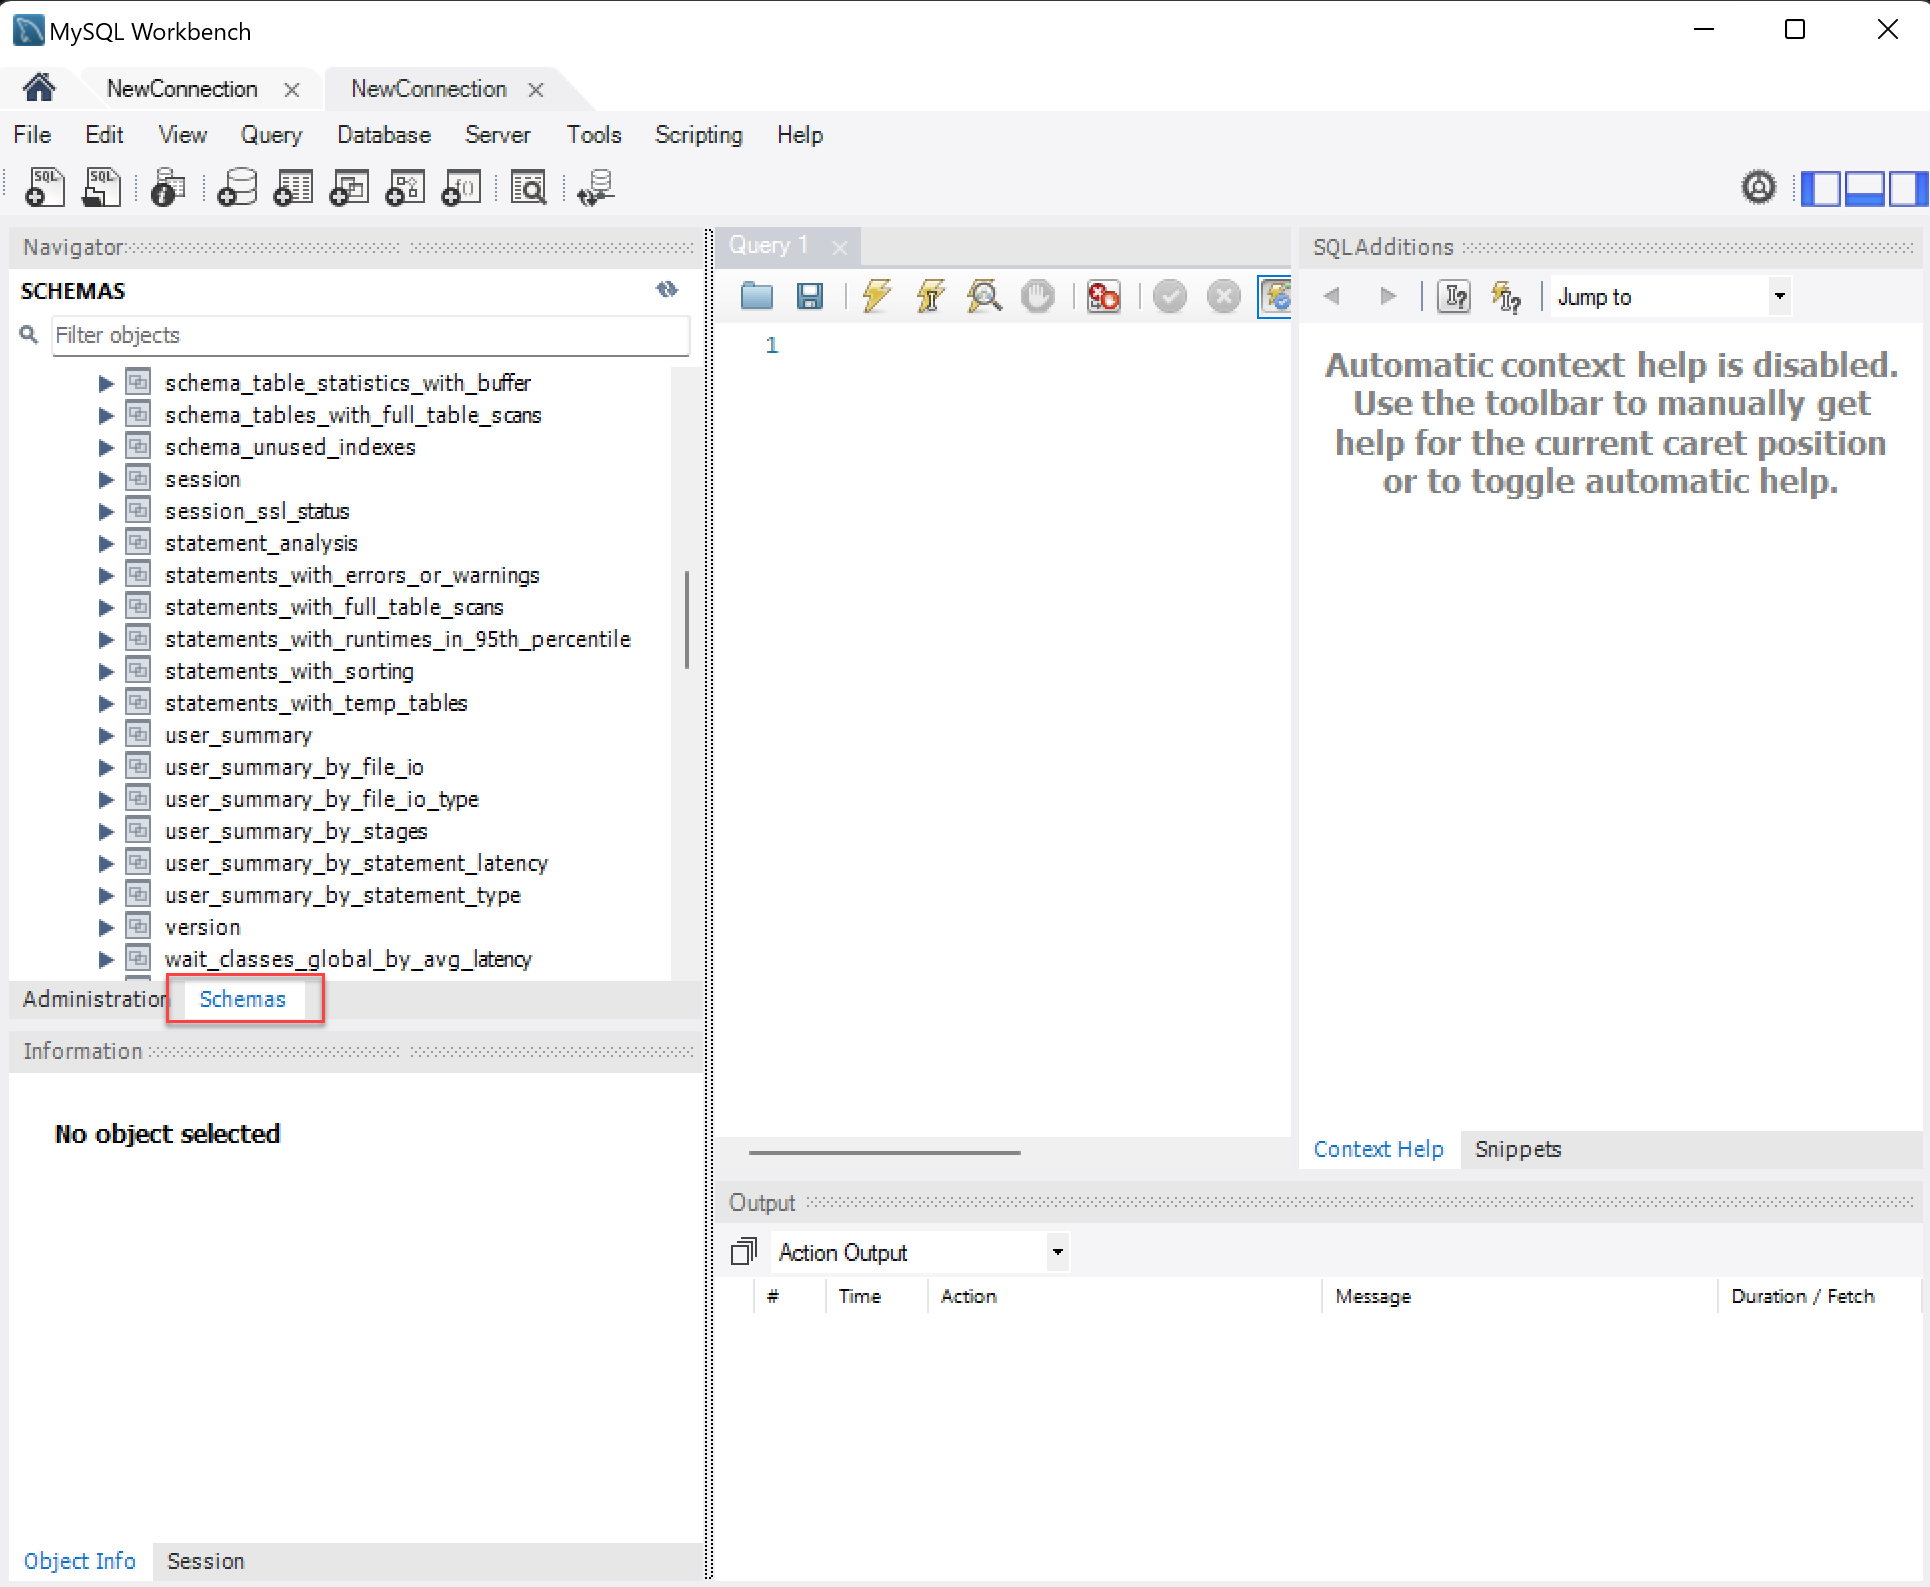
- If you right-click on a table and click "Select rows - Limit 1000," it will show the first 1000 rows of a table for you to inspect and make sure everything is correct.
This concludes the setup and configuration phase of setting up MySQL. You are now ready to use it with Aurora.
If you missed the Configure the MySQL Server Now at the end of the MySQL setup, or would like to make further changes to MySQL Server configuration you can access the wizard again by clicking the MySQL Server Instance Config Wizard icon in the Start Menu.
Configuration
To use MySQL with Aurora:
In the Reporting folder of Simulation Options, select MySQL as the Database Type and select the Change... button to begin the SQL Server setup.
Complete the form below.
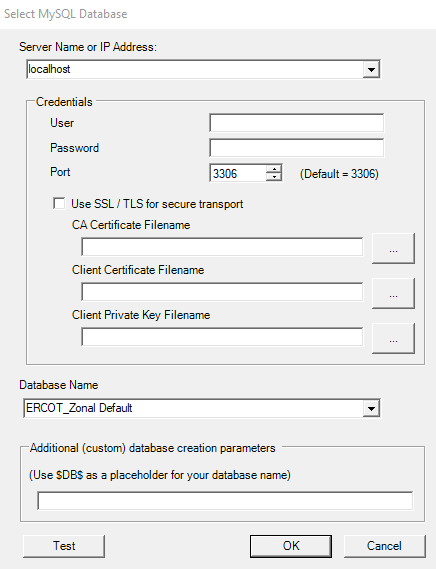
- If using the server on your local machine, the Server Name may be left with the default name “localhost”.
- If using a MySQL server that is using a custom port other than the default (3306), you can specify the custom port.
- If your server requires (or can optionally accept) connections using SSL / TLS for secure transport, you may configure that option by checking the corresponding checkbox on the form. Additionally, you may specify a CA Certificate filename which is used to validate the server identiy, and/or a client certificate filename and private key file which will be used to validate the client machine to the server. These three files must be .pem files. The MySQL server installation tools can create these for you. See the MySQL help for more details.
- Be sure the Database Name is a valid MySQL database name. Select one from the list of existing databases or type in a new name.
![]() NOTE: The MySQL database name cannot begin with a space or contain embedded spaces, special characters, or reserve words.
NOTE: The MySQL database name cannot begin with a space or contain embedded spaces, special characters, or reserve words.
- (Optional) Use the additional parameters area when creating custom MySQL output databases. These additional parameters are specified by entering additional valid MySQL CREATE DATABASE clauses into this text field, which will be appended to the CREATE DATABASE command. Because MySQL Server environment configurations can vary greatly, the syntax of these statements is highly dependent on the setup of the MySQL Server you are using (e.g. user access rights, folder permissions, etc.). The syntax to use should be the desired MySQL syntax immediately after the following wording:
"CREATE DATABASE thedatabasename"
![]() NOTE: If a MySQL database with a given name already exists, Aurora will not drop it, rather it drops all the tables. A new database is not created for existing database even if the multiple runs to a database is not set.
NOTE: If a MySQL database with a given name already exists, Aurora will not drop it, rather it drops all the tables. A new database is not created for existing database even if the multiple runs to a database is not set.
- Use the text boxes for MySQL Server Name/IP Address, MySQL User and Password to set the corresponding values for MySQL. If you followed the setup instructions above you should enter the following:
MySQL Server Name: localhost
User Name: root
Password: (the password you created in the MySQL Server Instance Configuration Wizard)
- If you need further help with MySQL, access their extensive documentation resources at http://dev.mysql.com/doc/
![]() Using MySQL with Aurora
Using MySQL with Aurora