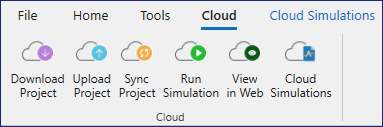
Cloud Simulations
This topic provides more specific information about the functionality of each option in the Cloud tab and the Cloud Simulations tab.
For more information on Cloud Simulations, also see Cloud FAQs for processing projects in the Cloud.
Download Project 
Download Project will enable you to download an Aurora project existing in your Cloud environment to your local desktop. A Cloud project must be downloaded to a local machine to modify and run the project.
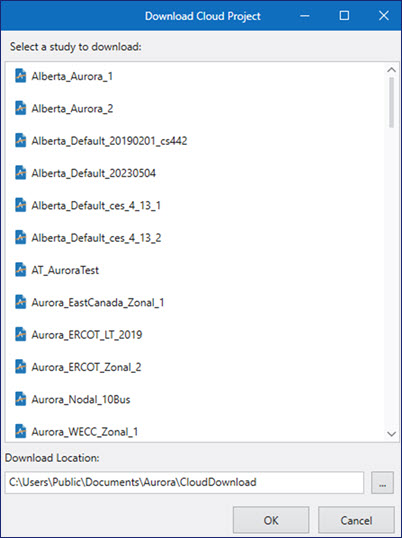
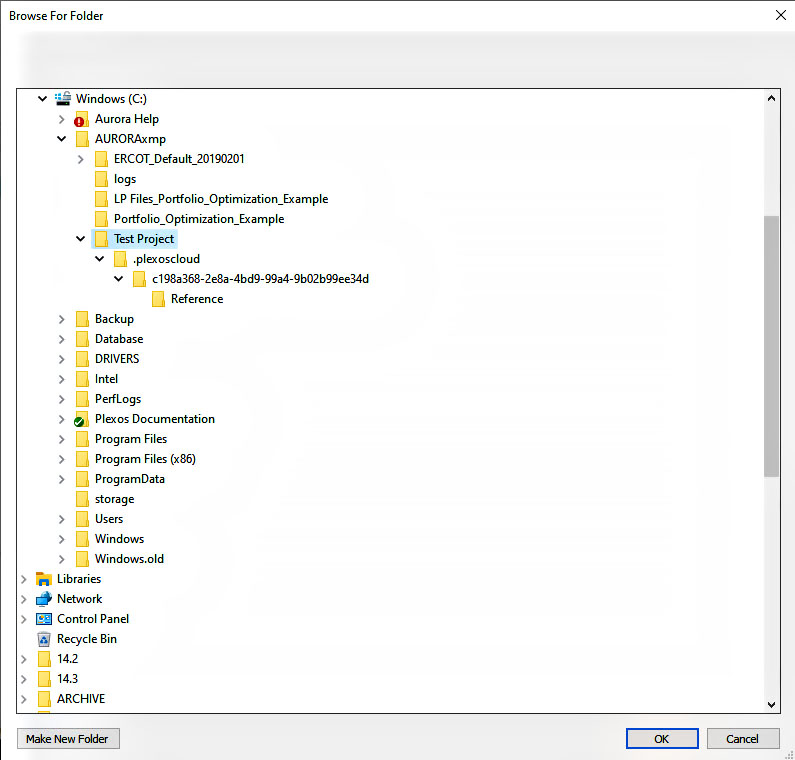
Choose the location where you want the Aurora Cloud project downloaded. The project file, and any related files to the project (such as Input Database or Change Set files, will be downloaded to the folder. Once the project is downloaded, it will automatically open in Aurora.
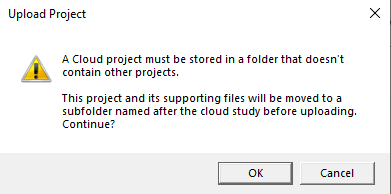
Upload Project 
Use this option the first time that you want to upload an existing local Aurora project to the Cloud environment. When a new project is created, it will copy and move the Aurora project (.apz file and any related files) to a new folder with the same name as the Cloud project.
Project references to these files (such as Change Set file or Quick View file) will also be updated to the ones in the newly created folder.
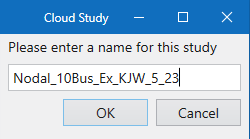
Click OK and enter the name of your project where you will store the files from your Cloud study.
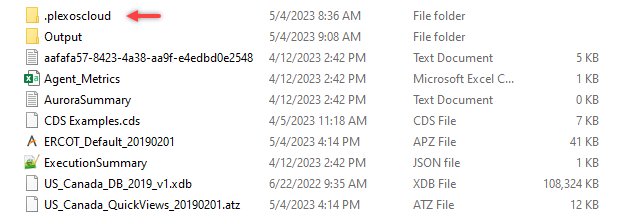
This folder will have a .plexoscloud folder included in it, holding necessary information connecting and syncing the project with the Cloud. Do not delete this folder. Once this project is uploaded, you should not manually move the Cloud project folder to a different location.
![]() NOTE: Theoretically, you should only need to use Upload Project and Download Project once. You will mostly use Sync Project repeatedly to move your changes from your local machine to the Cloud, or whenever changes are made to a Cloud project by someone else and you want to pull them from the Cloud to your local machine.
NOTE: Theoretically, you should only need to use Upload Project and Download Project once. You will mostly use Sync Project repeatedly to move your changes from your local machine to the Cloud, or whenever changes are made to a Cloud project by someone else and you want to pull them from the Cloud to your local machine.
We recommend that you delete that project locally and then use the downloaded project to move Cloud projects to a different location on your local machine.
For the SQL Server Input database, when the project is first uploaded, an .xdb database will be created with the same information as your SQL Server Input database. The Cloud instance will use that SQLite database instead of the SQL Server database when running since it will not have access to your SQL Server instance. However, locally, your project will still be linked to the SQL Server database to SQLite again. This is useful when changes have been made to the SQL Server Input database. If no changes have been made to the Input database, the database will not be re-uploaded and synced with the Cloud project again to save time.
Sync Project 
Use Sync Project to pull down any changes made and uploaded to the Cloud project and save them to your local project file. Syncing also pushes any changes made to your local project to the Cloud project.
When you make changes to your local project, you must use Sync Project before using Run Simulation to have those changes appear in the next Cloud simulation.
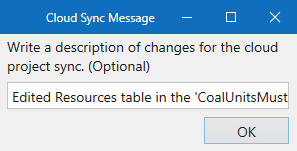
When using Sync Project, a dialog will display asking you if you would like to write a message detailing the changes that have been made since the last sync. Since you cannot see what specific changes have been made to your Aurora project for a sync, this is useful for keeping track of changes.
For SQL Server Input databases, when the project is first uploaded, an .xdb database will be created with the same information as your SQL Server input database. The Cloud instance will use that SQLite database instead of the SQL Server database when running since it will not have access to your SQL Server instance. However, locally, your project will still be linked to the SQL Server database.
During Sync Project, you will have the option to convert the SQL Server Input database to SQLite again. This is useful when changes have been made to the SQL Server Input database. If no changes have been made to the Input database, the database will not be re-uploaded and synced with the Cloud project again to save time.
Run Simulation 
Run Simulation will start a simulation in the Cloud. There are several options to choose from in the Run Cloud Simulation dialog. These options will be saved with the project so it will default to those options.
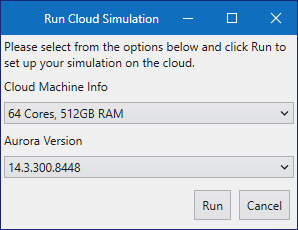
Choose the number of CPU Cores and the amount of memory to run the Cloud simulation. These options will be determined by the Cloud environment you are signed into. Choose the Aurora version to run the simulation.
You can choose to sync the project with the Cloud before running a simulation. By default, this occurs automatically to ensure you are running with your latest changes.
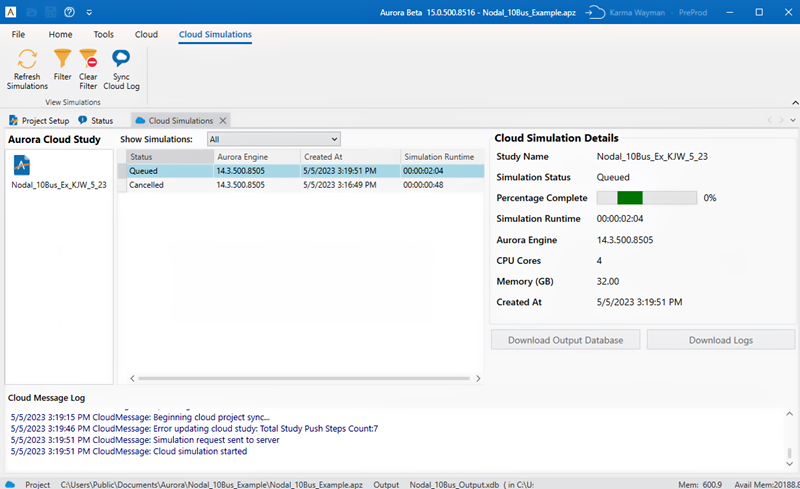
A Cloud Simulations window displays starts running to show you that the Aurora Cloud Study is in the queue to start running a simulation.
View in Web 
This will open your simulation on the PLEXOS Cloud environment.
Cloud Simulations 
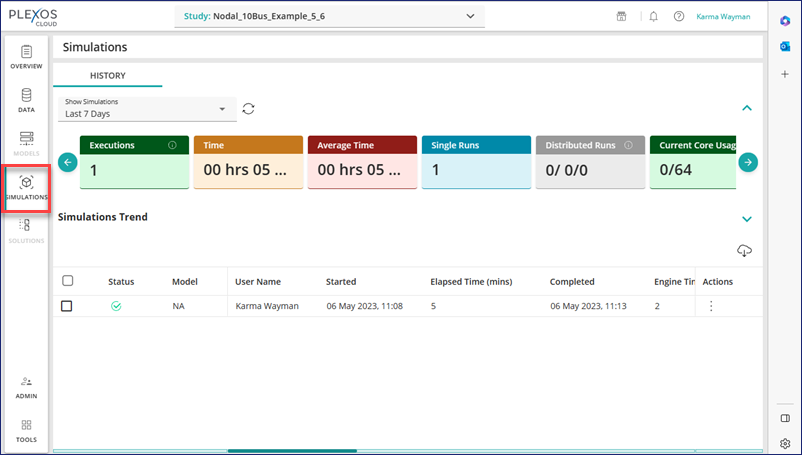
Select this option to display a window that shows the Cloud study associated with your project along with all the Cloud simulations that have been run previously. This window is also where Output databases and their log files can be downloaded from Cloud simulations.
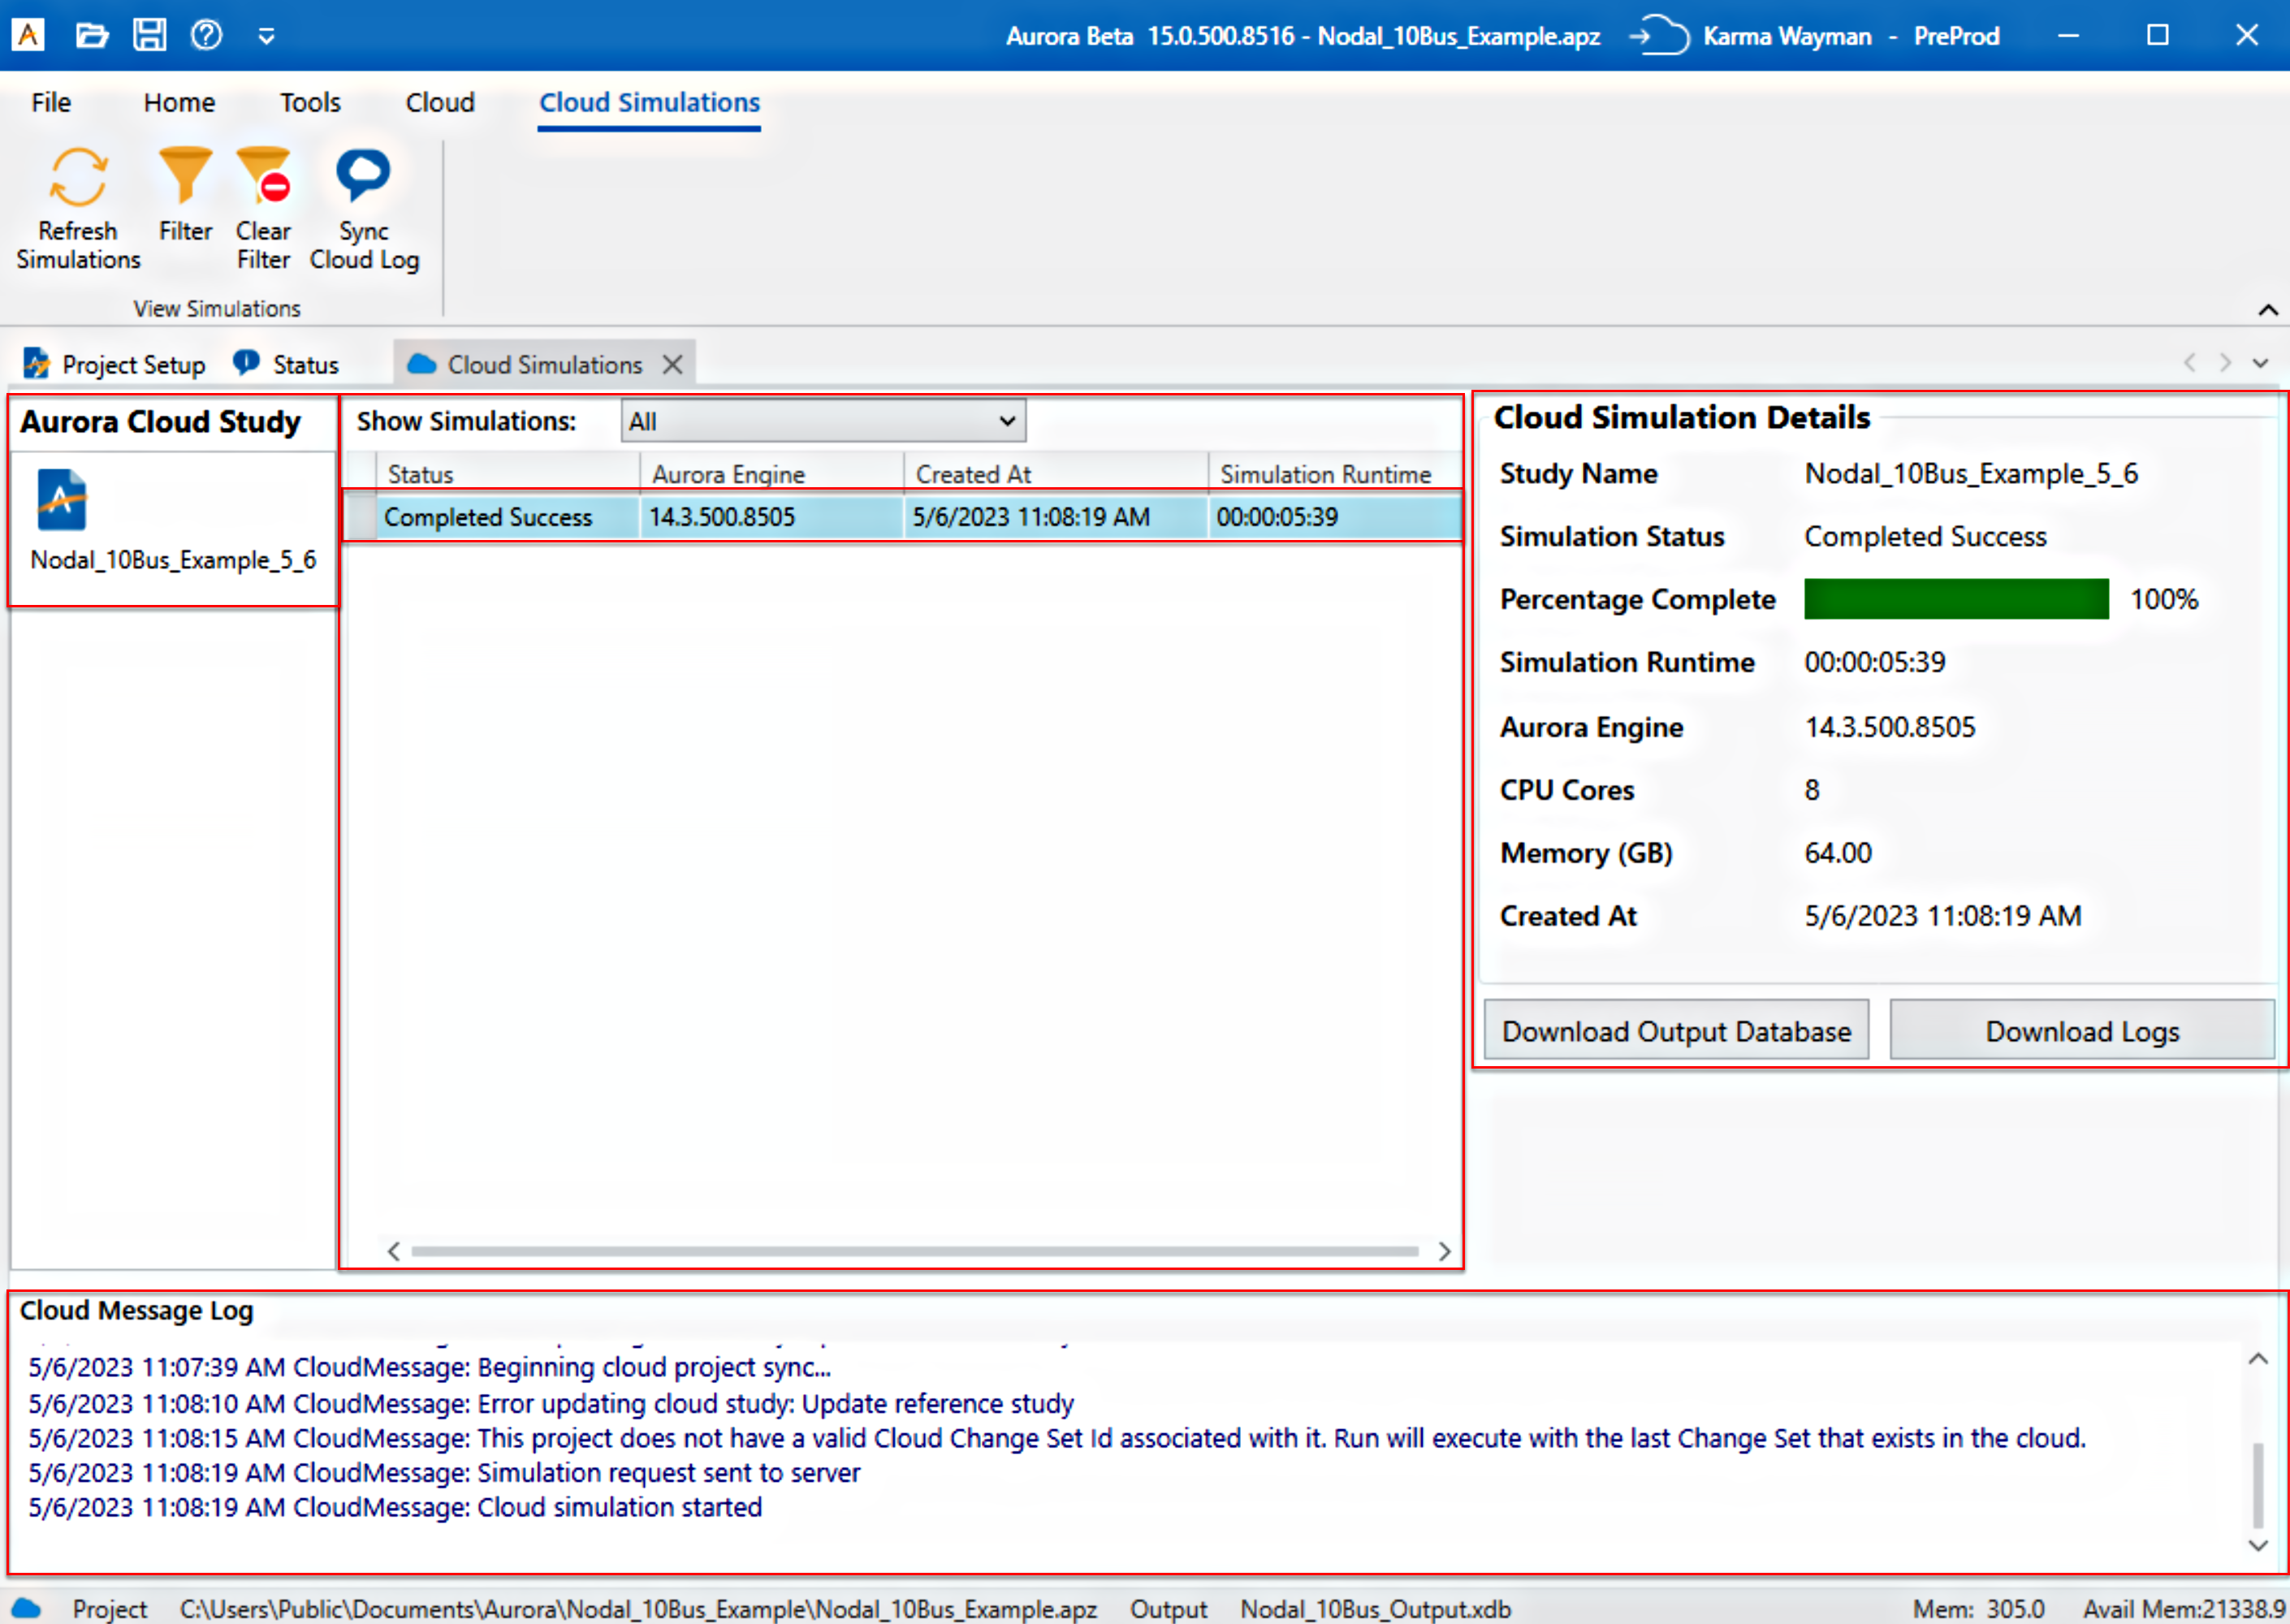
This window is also where Output databases and their log files can be downloaded from Cloud simulations. Any information or messaging related to your Cloud project will also appear in the Cloud Message Log section.
Aurora on PLEXOS Cloud Study
The Aurora on PLEXOS Cloud Study section will show the name of the Cloud project associated with your local Aurora study. The status of your selected study is shown in the middle section of the window. This section keeps an account of your simulation runs and their results.
Cloud Simulations
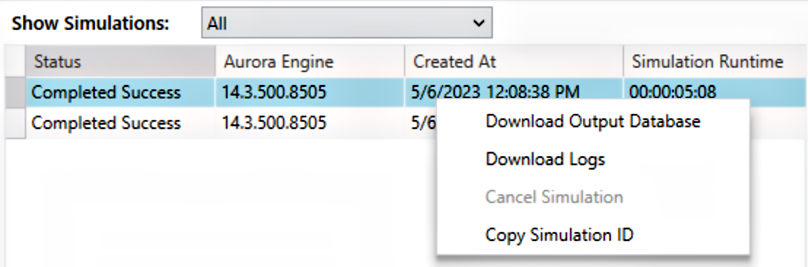
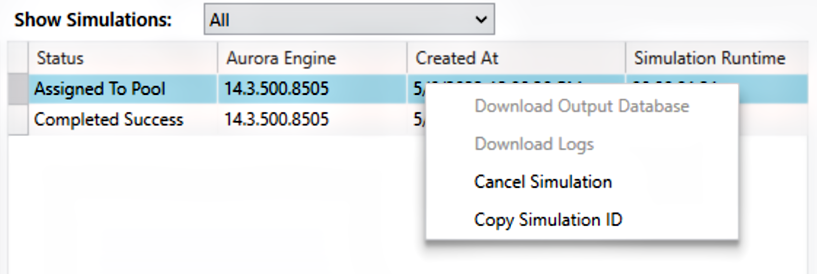
In the section in the middle, all the Cloud simulations associated with your Cloud studies are displayed. You can filter what simulations appear in this section by using the Show Simulations dropdown to filter by date or use the Filter button to filter by specific column information.
If you right-click on a simulation in this panel, you will see options to download the Output Database, Download Logs for this simulation, Cancel the simulation, or Copy the Simulation ID.
The Simulation ID is a unique identifier for the Cloud simulation. This can be helpful when you are looking for corresponding Cloud logs for the simulation (which are titled by the Simulation ID). Whenever you reach out to support for a specific simulation, this ID will help Energy Exemplar identify your simulation to troubleshoot it.
Cloud Simulation Details
This section will provide more information about the currently selected simulation. In this section, you can see the current percentage complete of the simulation, along with what CPU Cores and memory was selected for the simulation.
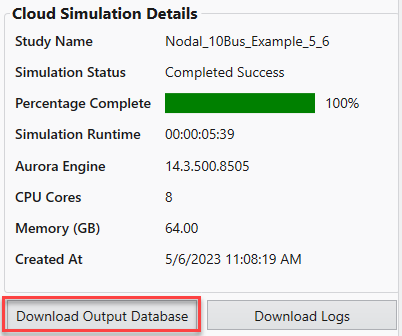
When the simulation successfully completes, the green bar in the Cloud Simulation Details will show 100% and the buttons below are no longer grayed out.
Download Output Database
This option in Cloud Simulation Details will open a dialog allowing you to download the Output database for simulation.
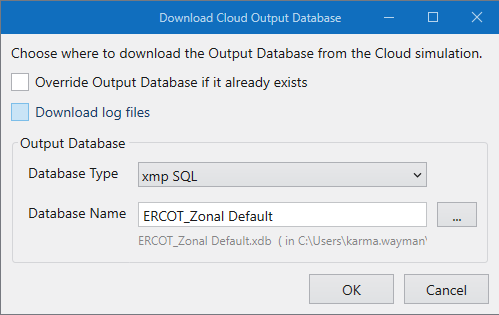
You can choose to override the Output database if the database exists with the same name locally. If you tried to download an Output database, and an Output database already exists with the same name, the Output database cannot be downloaded until you use this option to rename it.
Check the boxes to override any existing database files if they already exist and download any log files created during the simulation.
The Database Type list lets you select the type of file format for the output database. By default, the Cloud Output database is xmpSQL. Energy Exemplar recommends xmpSQL for most users.

You can choose what the Output database name will be, but it defaults to the project's current Output database name. Change the name and location of an Output database using the ellipsis  button. Navigate to the appropriate location, enter the file name, and then select Save.

Note that if using the SQL Server Database Type, there can be no spaces in the Output database filename. Enter the name of the database and click the ellipsis button to select the directory where you want your Output database to be stored.
Download Log Files
Download Logs will download the simulation log files to the same folder where the Output database was downloaded.
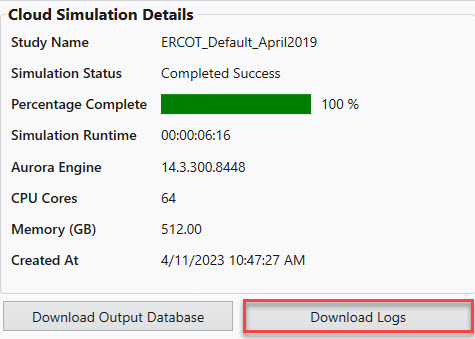
This will let you choose a folder to download all log files associated with the Cloud simulation.
Downloading Logs is useful when you want to see logs of the Cloud simulation without having to also download the Output database. This functionality is especially useful when the simulation finishes with an error and you want to better assess the nature of the error to get a better understanding of its cause.
Cloud Message Log
This section will show all messages relating to Cloud functionality in Aurora. You will find information and error messages about uploading, syncing, or running Cloud projects.

Sync Cloud Log 
When you use Sync Cloud Log, it will take the log of the Cloud CLI that is used to communicate with PLEXOS Cloud for Aurora to send and receive information from the Cloud and show the log in the Cloud Message Log section. This is for ease of use, so users do not have to find the specific Cloud CLI file themselves when they want more information about an error that happened using Cloud functionality.
 Cloud Simulations