Add Columns 
This dialog allows users to add more than one column to an Input table. The dialog will open with a list of optional columns that are not currently in the Input table. The user can also add custom columns to the Input table.
Any columns added through this dialog will be in the “Text” format, which has no restrictions on the cell values, unlike the Integer, Single, or Boolean column types.
Follow the steps below:
- Click the Add Columns button on the toolbar. The following window will appear:
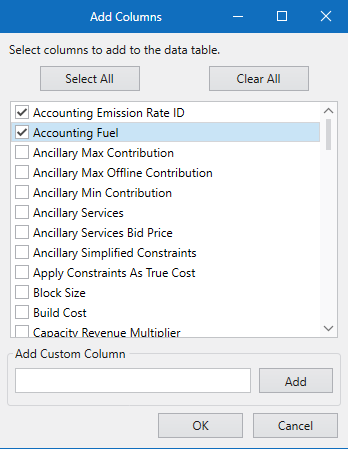
- Select columns by clicking on a checkbox, or you can highlight a column and hit the Spacebar. You can also highlight multiple columns and use the right-click menu to select or deselect the columns. You can also select or deselect all of the columns by hitting the “Select All” and “Clear All” buttons.
- To add a custom column, fill out the name of the custom column in the textbox and then hit “Enter” or the “Add” button.
![]() NOTE: NO SPECIAL CHARACTERS are currently supported for XML databases. When creating table or columns names, include only letters, numbers, spaces, and underscores. For the Time Series Hourly or Time Series SubHourly tables invalid column names also include Year, Hour, Month, and Day.
NOTE: NO SPECIAL CHARACTERS are currently supported for XML databases. When creating table or columns names, include only letters, numbers, spaces, and underscores. For the Time Series Hourly or Time Series SubHourly tables invalid column names also include Year, Hour, Month, and Day.
![]() NOTE: Additional columns are automatically saved to the input database. As such, no Undo is available. Use Delete Column to remove a column once it has been added.
NOTE: Additional columns are automatically saved to the input database. As such, no Undo is available. Use Delete Column to remove a column once it has been added.
![]() Add Columns
Add Columns