Query Builder for Output Database
Use the following instructions to create queries for a single output table and multiple join tables.
Double-click on the table name and the query will execute; the table will open in a standard output table window. See Output Tables for more information.
To save the query as a Quick View use the Save as Quick View button from the Data Table Toolbar. This will save the query in a custom template for easy future access. As with other output tables, tables based on query results can also be used to create new charts, reports, or output, CDS, and pivot tables.
Queries will be saved to any template that has used a query table to produce the data for the template. Output, chart, report, CDS, and pivot table Quick Views will all save queries that were used to create underlying data tables. See Using Quick Views for more information on working with Quick Views.
![]() NOTE: Each custom template is independent of other Quick Views. Editing a query in one template will not change a query in a different template, though it might have originally been saved from the same query output table.
NOTE: Each custom template is independent of other Quick Views. Editing a query in one template will not change a query in a different template, though it might have originally been saved from the same query output table.
Note that a table produced by a query is never permanently stored in the output database. As long as it has been saved as a Quick View, the next time the project is loaded the query can be executed to quickly reproduce the table.
-
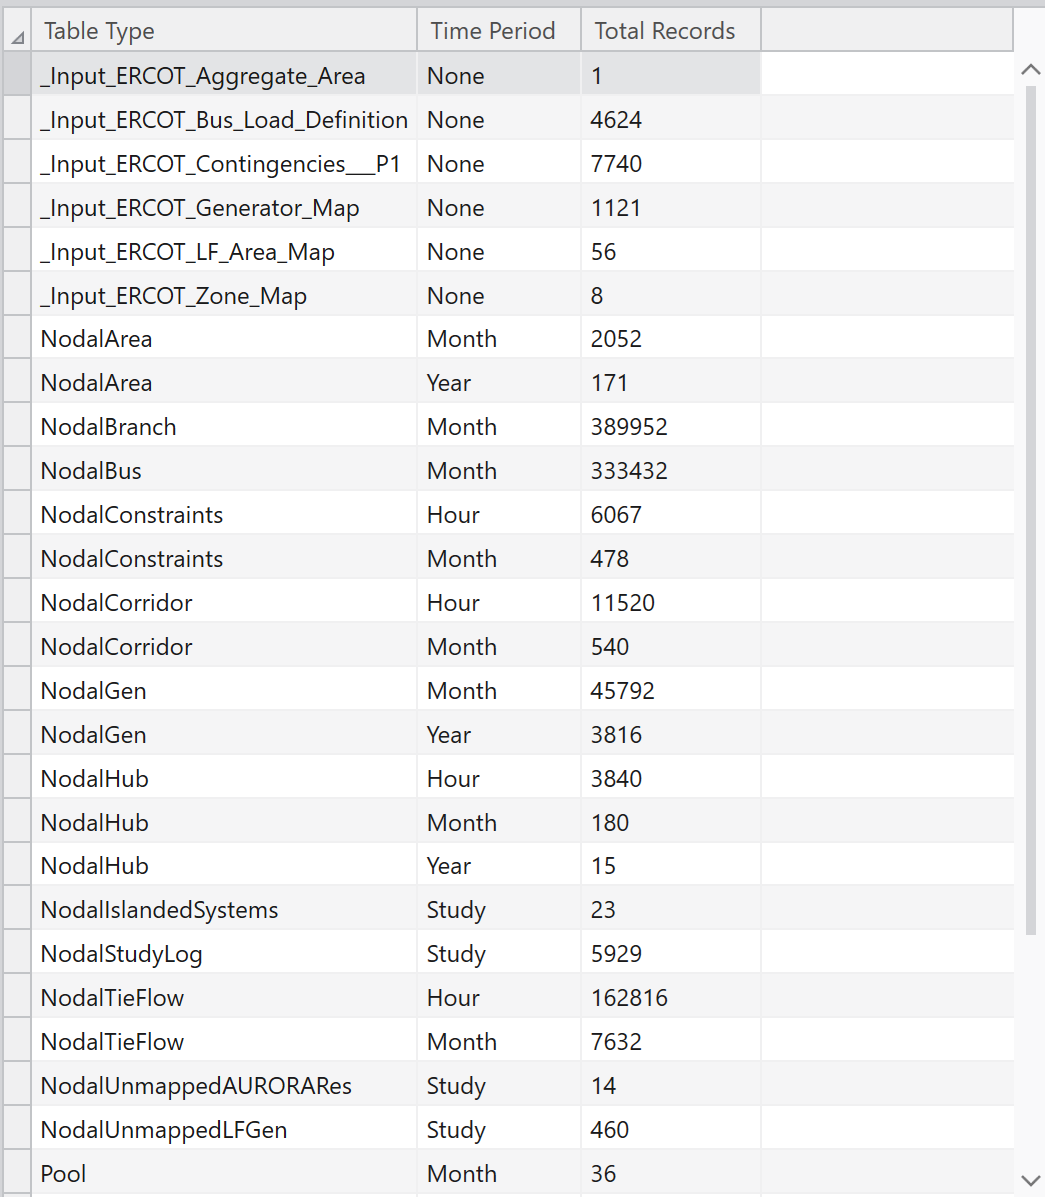
After completing a run, click the Output button on the Aurora Home Tab to display the Output Window and list of output tables.
-
Select the New Query button on the toolbar or right-click on the desired table and select Query Table (Ctrl+Q).

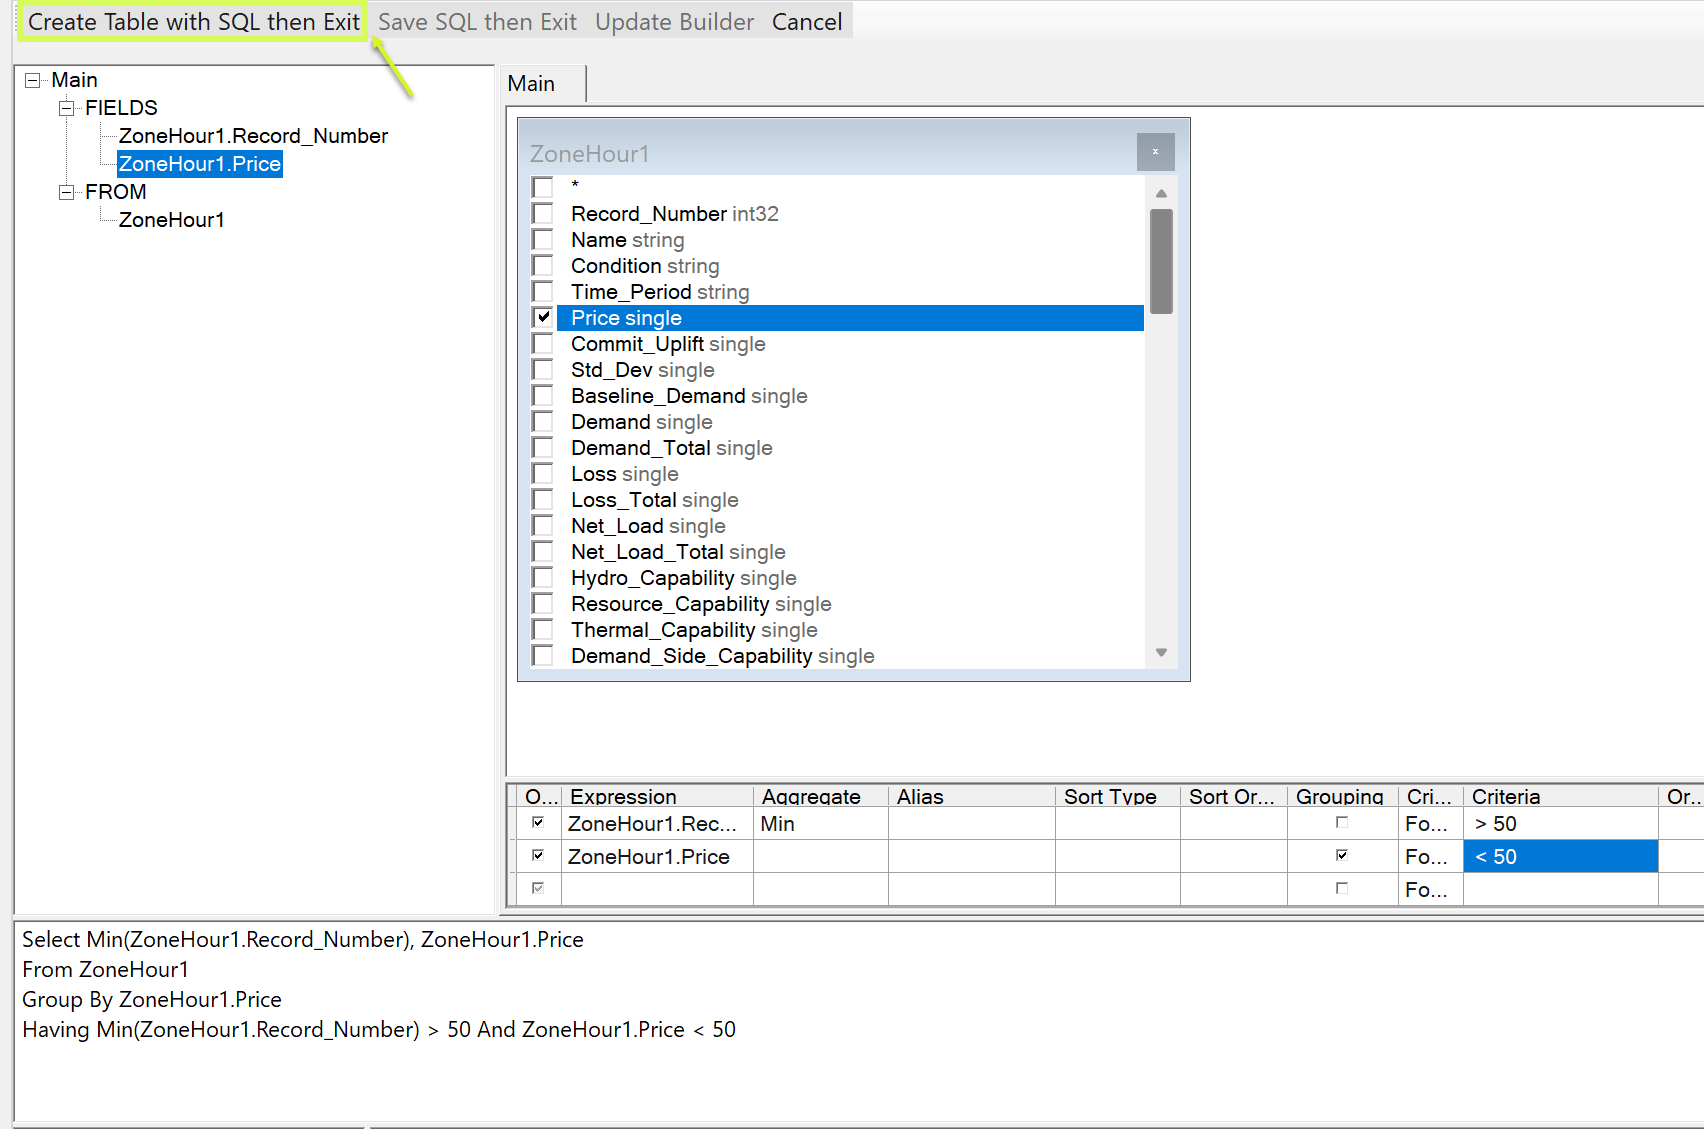
In the diagram above, the right-hand box (1) lists the available tables in the output database that you can select by double-clicking on the table name or you can drag and drop them in the Main area (2). If the right-click menu from the Output Table Window was used to launch the query builder, it automatically opens this form with the desired table selected. Multiple tables can be selected from the list. -
The upper middle area of the form (2) displays the selected table(s). Use this area to select column names from the displayed table(s) by checking the boxes or to create Multiple Table Joins.
-
The columns you select will appear in the center grid in area (3). Use the columns to make expressions and to define query conditions such as sort, order, or filtered conditions. For instance, to choose price records where the price is greater than 50 enter "> 50" in the Criteria column for the price field.
-
The lower box contains the SQL query generation. As expressions or conditions are applied in the grid (3) the lower box is populated with the SQL syntax. This area can also be directly modified, and the changes will show up in the other areas of the builder (this is only recommended for those familiar with SQL syntax).
- When satisfied with the query construction, click Create Table with SQL then Exit on the toolbar at the top of the form.
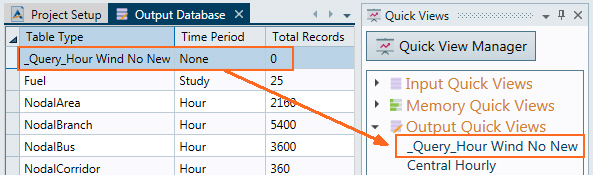
- A prompt will appear requesting a table name. Enter a table name (no special characters) and a new entry for that table will be created in the Output Window with the prefix “_Query_” indicating the table is derived through a query.
- Double-click on the table name and the query will execute, the table will open in a standard Output table window. See Output Tables for more information.
![]() Productivity Tools
Productivity Tools
![]() Query Builder
Query Builder