Quick View Manager 
The Quick View Manager is accessed in the Quick View window via the button at the top or from Quick View Right-Click Menu.
See Using Quick Views for more information on creating, using, and customizing views.
Set-up Options
This window provides options for editing and automating the use of Quick Views.
Automatically Load Selected Quick Views
Use this switch to automatically load the selected Quick Views for viewing at the end of a run. Once checked, click on Quick Views from the list and select them by checking the Open Quick View when Simulation Completes options discussed below.
Name
Use the box to change the name of the Quick View.
Type
Shows the type of Quick View for the selection.
Open Quick View when Simulation Completes
Only available when the main Automatically Load Selected Quick View is selected, this option activates loading a view into the window at the end of a simulation and the Save option below.
Save Image File
If checked, this option creates a graphic output when the Quick View is loaded. File formats include .BMP, .PNG, and .JPG. Existing files with the same name will be overwritten on the next project run/load template file.
![]() NOTE: If using the Attach To Email feature below, use .PNG or .JPG file formats for best results when attaching multiple templates or tables that may be more than a couple pages long. These files are smaller in size. The .BMP is typically the largest file of the available formats.
NOTE: If using the Attach To Email feature below, use .PNG or .JPG file formats for best results when attaching multiple templates or tables that may be more than a couple pages long. These files are smaller in size. The .BMP is typically the largest file of the available formats.
Image Filename
Use this box when the Save Image File box is checked to name the file and determine its location. If a name is not specified, the graphic will not be saved. Use the  button to browse to a location and select the file type for saving.
Attach To Email
Use this option to attach a saved Quick View to an email. The Save Image File must be checked and an Image Filename provided for the email function to work.
![]() NOTE: Emails that include image file attachments may be filtered as spam by some email software programs. Please check with your email administrator if you experience issues sending/receiving certain file types.
NOTE: Emails that include image file attachments may be filtered as spam by some email software programs. Please check with your email administrator if you experience issues sending/receiving certain file types.
Query
This section offers a view of the query syntax used for query tables. To edit the query, select the right-click option from the Quick View window.
Quick View Manager Ribbon

|
|
Import Quick ViewsThis feature is used to Import Custom Quick Views from a different project file. You can build and save individual, custom Quick Views in any system file without having to recreate the custom Quick View each time. |
|
|
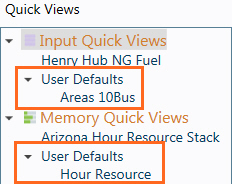
Show User DefaultsThis button adds the saved User Default views to the Manager window for editing and refinement. User Default views will show like this:
|
|
|
DeleteThis button deletes the selected Quick View. There is no undo for this function. |
|
|
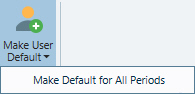
Make User DefaultThis button applies the saved view to a user-defined default view. User Default view are stored separately from the Quick View project file and are applied to all tables of that type when opened by double-clicking the table. These default views will not show in the Quick View window, and will only appear in the Quick View Manager when Show User Defaults (above) is turned on. For output tables only, there is the additional dropdown option to Make Default For All Periods which broadcasts the selected Quick View formatting across all time periods of the same table type and create new default views. It is especially helpful for generating consistent default output across time periods from custom views already created in the project. Using this option, a default view for any output time period can be instantly propagated to all time periods for the UserDefault.
|


|
Example:
|
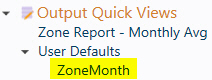
Using a custom view called "Zone Report - Monthly Avg" for a ZoneMonth output the Make User Default button was used to create a User Default view for any ZoneMonth table opened by the user in any project.
|
|
|
Next, while ZoneMonth was selected the Make Default for All Periods was clicked.
|
|
|
This created User Default views for all time periods, so there are now newly created User Default views for ZoneYear, Zone Day, ZoneHour, ZoneSubHour and ZoneStudy. As a result, all formatting when viewing the Zone outputs are now identical. A reminder that User Default views are not saved with the project, but rather at the application level for the user. Once saved, any table of the same type opened by the user, in any project, will use the User Default view. |

|
|
Open Quick View FileUse this option to open an existing Quick View file in .atz format. This will change the Quick View file associated with the open project (.apz). |
Save Quick View FileUse this option to save changes to the active Quick View file. Current changes will also be saved automatically upon exiting Aurora. |
|
|
|
Save Quick View File AsUse this option to create a duplicate copy of the active Quick View file. Changes made to the Quick View will then apply to the new file that is now associated with the project. This option is useful for saving a default Quick View file, i.e., one that is automatically created when no Quick View file exists (created in C:\ProgramData\EPIS\Aurora\Template.atz) as a new file associated with a specific project. |
Restore Original Quick ViewsSelecting this option will restore the original default table views that came with the Aurora installation. |


![]() Quick View Manager
Quick View Manager