Working with Change Sets
Change Sets provide the ability to create and save multiple sets of data changes within a single Aurora project. They are a convenient and efficient way to set up and run sensitivity studies or scenario analysis beyond a base case set of assumptions.
Creating a Change Set: Fuel Table
-
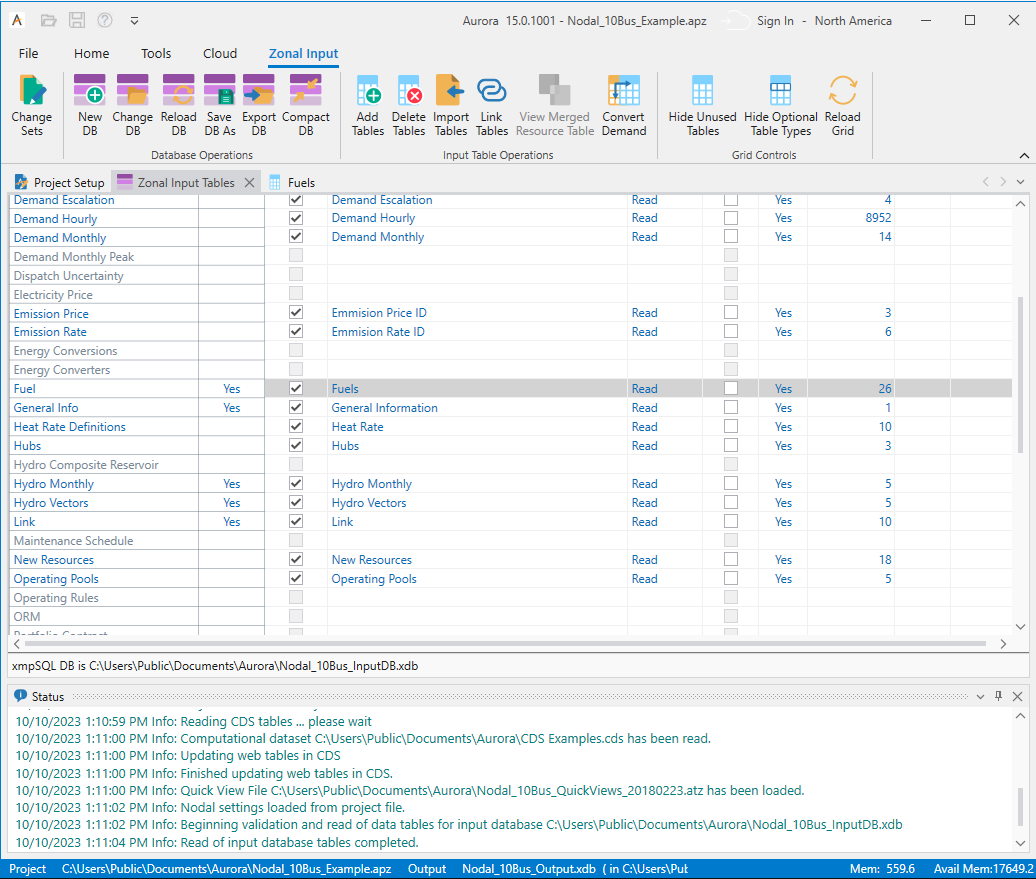
Select the Input Data button on the Home Tab to open the Input Tables Window.
-
Select and open the Fuels table by double-clicking on it.
-
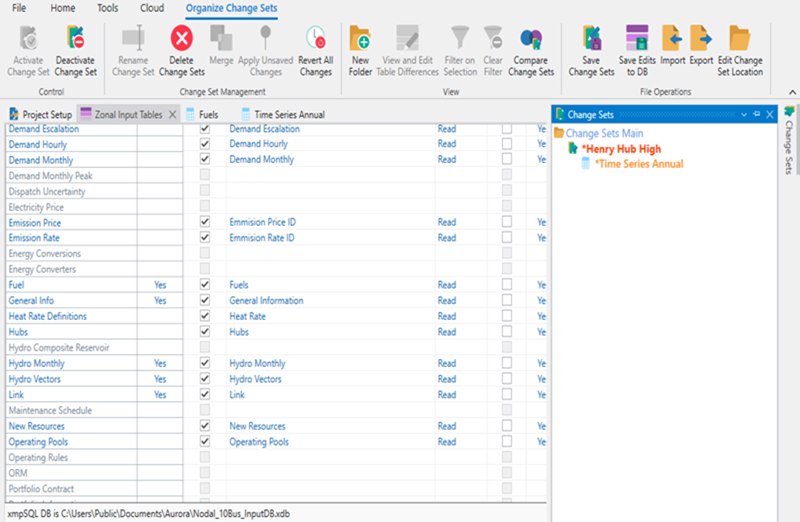
On the Fuel Name column, Filter for Fuel Names containing the word "Henry." The view will now display only the Henry Hub Natural Gas fuel reference.

-
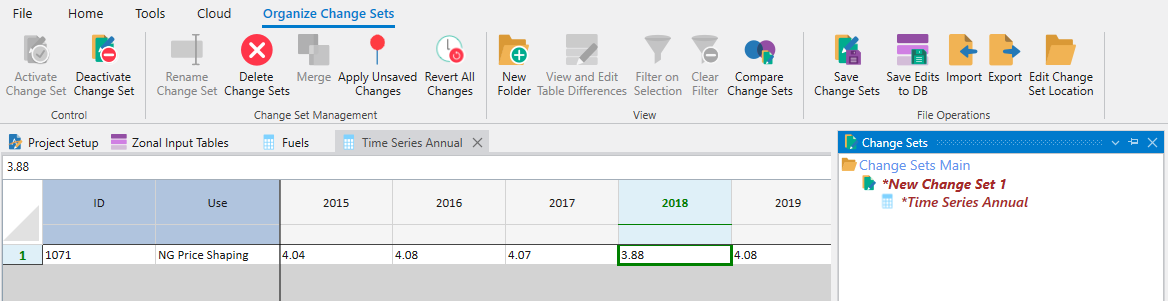
To change the annual fuel price for 2018, select a Price cell and double-click on the reference to open the Time Series Annual table.

-
Scroll over to the column that contains the price for 2018. Change the price and press Enter.

-
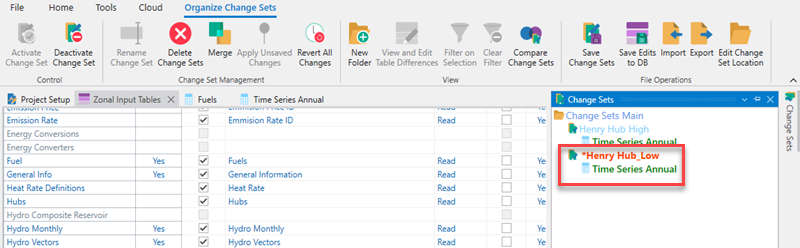
The edited input table name is now displayed on the left side of the Change Sets window under the heading New Change Set 1.
-
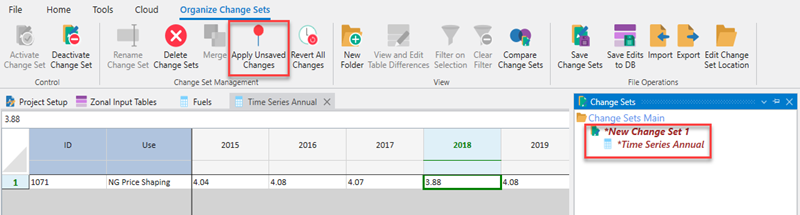
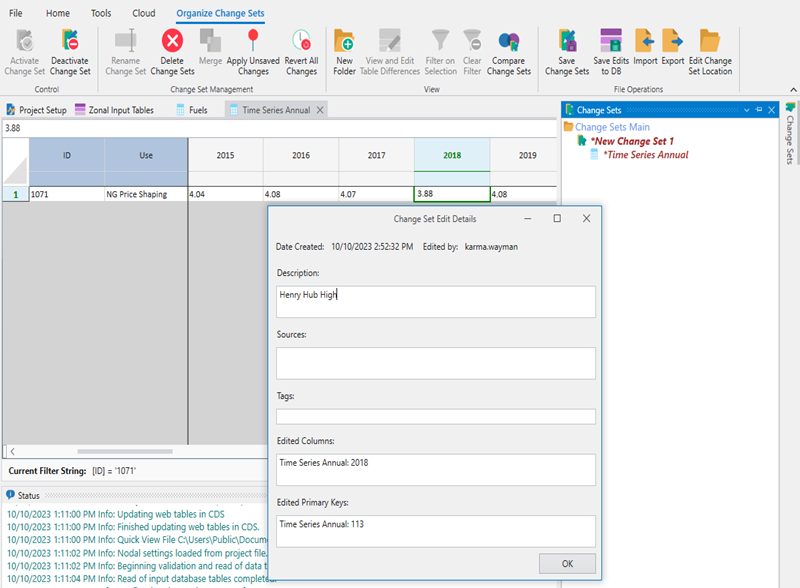
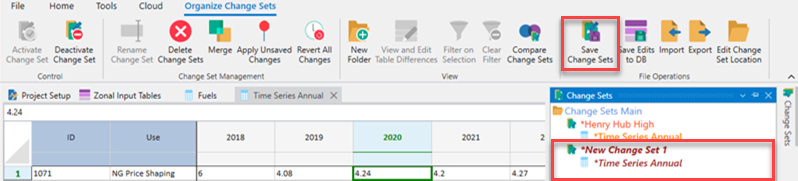
Select the Apply Unsaved Changes button on the Change Set Toolbar and enter a name for the Change Set ("HenryHub_High" in the example below).
![]() NOTE: The Change Set name cannot contain special characters and is limited to 50 characters.
NOTE: The Change Set name cannot contain special characters and is limited to 50 characters.
-
Click the OK button to create and save the Change Set to memory (at this point it is not permanently saved, but the Change Set is active).
-
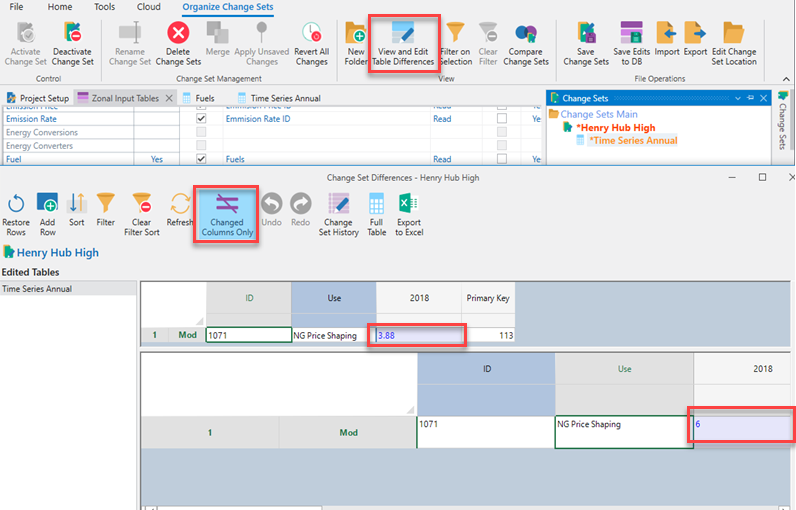
Use the View/Edit Table Differences to see the changes to the base data:
Creating an Additional Change Set: Fuel Table
-
Select and deactivate the active Change Set by using Deactivate (Ctrl+D) from the Change Set Right-Click Menu.
![]() NOTE: If the active Change Set is not first deactivated, all subsequent changes to the input data will be applied to the active Change Set.
NOTE: If the active Change Set is not first deactivated, all subsequent changes to the input data will be applied to the active Change Set.
-
Make additional changes to the input data as desired (described above).
-
The edited input table name is again displayed in the Change Sets Window under the heading Unassigned Changes.
-
Select the Save Change Sets button on the Change Set ribbon menu and enter a name for the Change Set ("HenryHub_Low" in the example below).
![]() NOTE: The Change Set name cannot contain special characters and is limited to 50 characters.
NOTE: The Change Set name cannot contain special characters and is limited to 50 characters.
-
Click the OK button to create and save the Change Set.
Applying Change Sets for Scenario Studies
-
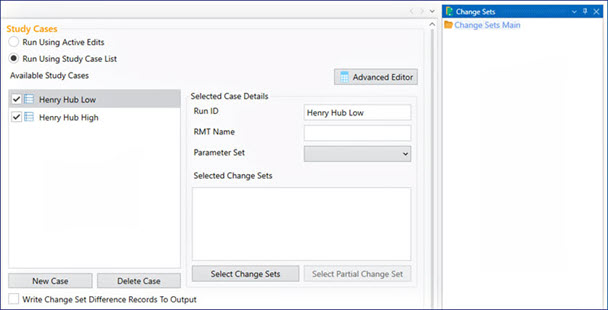
Navigate to the Study Cases form in Project Setup.
-
Select the Run Using Study Case List option.
-
Add a new case by click the New Case button. By default the case will automatically be checked for use in the simulation.
-
Customize Run_ID to be used in the output report by entering it in the Run ID field using only letters and/or numbers in the field (no special characters). By default, when no Run ID is defined Aurora will assign a concatenation of the Change Set names for that case, e.g., InpDB<--HenryHub_Low.
-
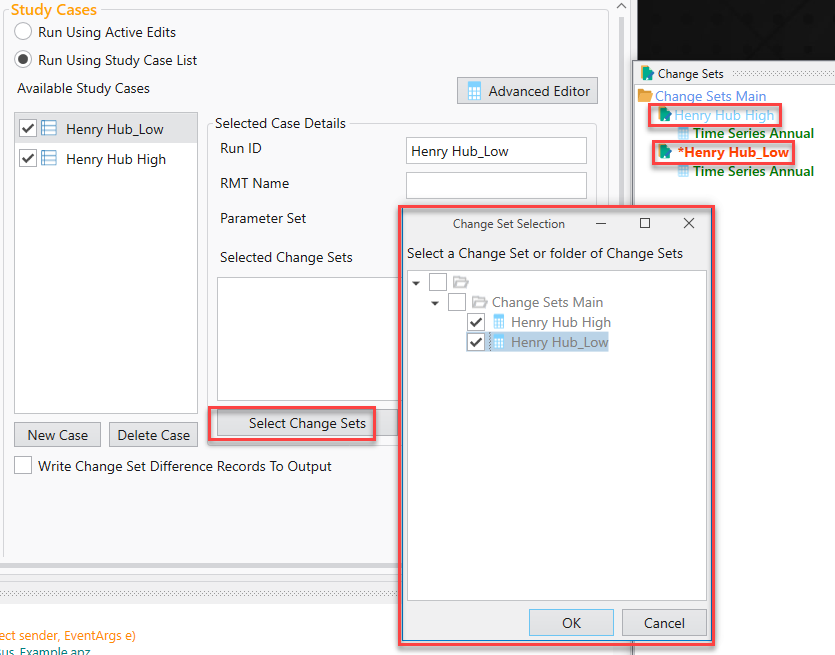
Select the desired Change Set(s) to use in the case using the Select Change Sets button. A list of available Change Sets will appear in a popup box. The Selected Change Sets field can be left blank if the case will not use a change set (i.e., run using only the Input database).
-
Enter the three scenarios as shown above. If not already selected, check the box next to each case to activate the ones to be used in the study.
![]() Working with Change Sets
Working with Change Sets